This blogpost will be introductory to version control within Microsoft Fabric. If you’ve got the basics of this under control, you’re welcome to refresh your knowledge in this blog or check out our points of view. Alternatively, you can dig into the blogposts by Kevin Chant who has a lot of good posts on this subjects. No wonder he was awarded a second MVP on this speciality area.
What is version control?
Let’s start with some basics on version control. In essence, it’s nothing more than versioning all your code, making sure you can revert updates. You will be able to browse through the history of all your code and you can find out when a certain change has been made. And yes, this is usually done when something breaks and the question is: “who did it”. This is also the moment you find an anonymous contributor with the username “butler”.
It also enables you to implement code reviews to prevent a brilliant idea turning into an outage.
In the early days, Microsoft offered an on-premises service called Team Foundation Server (TFS) but there were other alternatives. These days, the industry standard is Git. Some companies use Git in the pure form, other use derivatives like GitHub, GitLab or Azure DevOps. No matter your choice, in the end it’s using the same essence, versioning your work.
Branching
When you’re using Git, one of the things you want to get used to is using branches. This way you can create new code and test it without interfering on running and (probably) working code. When your changes are complete, you can create a so-called pull request. This alerts other members of your team to import your changes into a review branch, add other changes (commits) where needed and prepare the code for a merge. This is done with a merge request where the new code is merged with the existing code.
There’s a lot more to branching than this, but in the end, this is the core of branching.
Version control in Microsoft Fabric
Now that we have a basic understanding of version control, let’s see how this works inside Microsoft Fabric.
Github or Azure DevOps
When you create a new workspace, you have three options to connect it to regarding version control; Github, Github Enterprise or Azure DevOps. It really depends on your personal preference or what your company (or client) is using to decide which of these to use. Both options work and there shouldn’t be major differences from the Fabric point of view.
If you have a need to keep your code in a specific region, you’re choices are ‘limited’ to Azure DevOps or GitHub Enterprise. GitHub itself only stores data in the United States. We’ll get back to that one a little later in the blogpost.
A little clarification, GitHub has been acquired by Microsoft some time ago, Azure DevOps has been a Microsoft native tool for a long time. One of the biggest question is how long Microsoft will keep working on both solutions.
Admin portal settings
When you open the Admin portal, you can find a number of settings regarding Git in general.
Let’s go through these one by one.
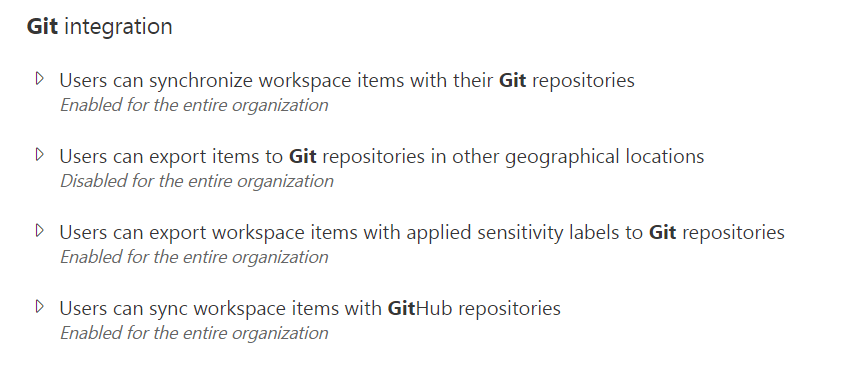
Users can synchronise workspace items with their Git repositories
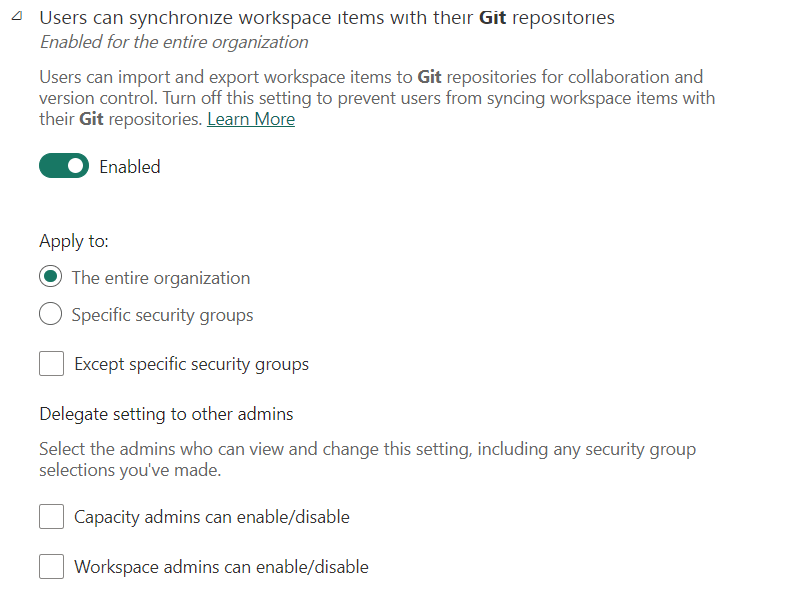
You can set a few things here. These settings are self-explanatory so let’s not get into these too much. The tricky part is the first sentence; users can synchronise workspace items with their Git repositories. This implies that it can be any git repository. And that is correct, as long as it’s a Github or Azure DevOps one. So make sure that not everyone can do this as you don’t want just any repository to be connected to your Fabric environment. Click here for the documentation.
Remember to check the list of supported items for Git; it’s very much subject to change and with the release of new items it’s always worth to check if they’re supported.
Users can export items to Git repositories in other geographical locations
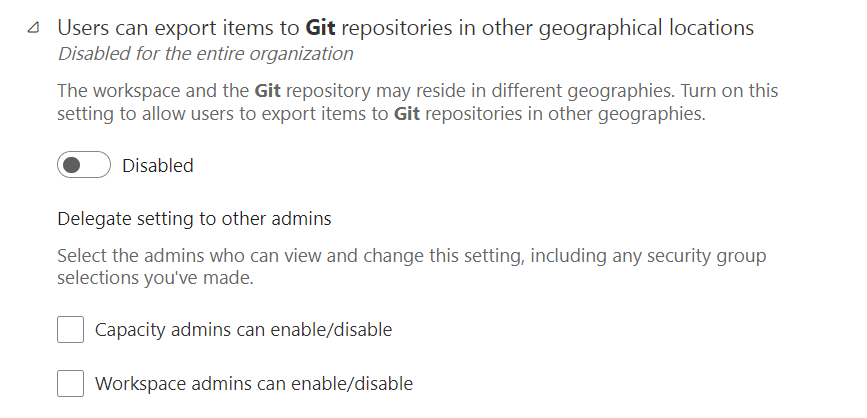
This sounds quite straightforward and it is. Well, until you realise that Github has it’s main servers running in the United States. Not an issue if you live there, for Europeans it can be a blocking issue. If you move to Github Enterprise, you can choose the data residency. The same goes for Azure DevOps, it will choose the location most near to you and you can move the DevOps organisation if you want. Especially if everything you do is GDPR bound, having the option to keep everything within the EU can be a good thing.
When I created a repository for this blogpost, the following screen popped up.
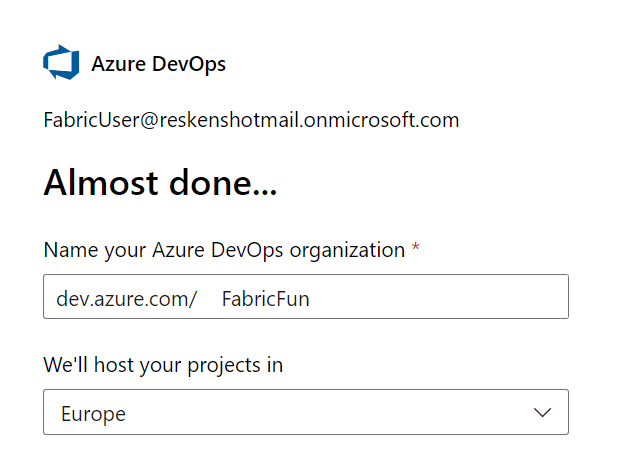
As you can see, there’s a way to control your data residency.
Users can export workspace items with applied sensitivity labels to Git repositories
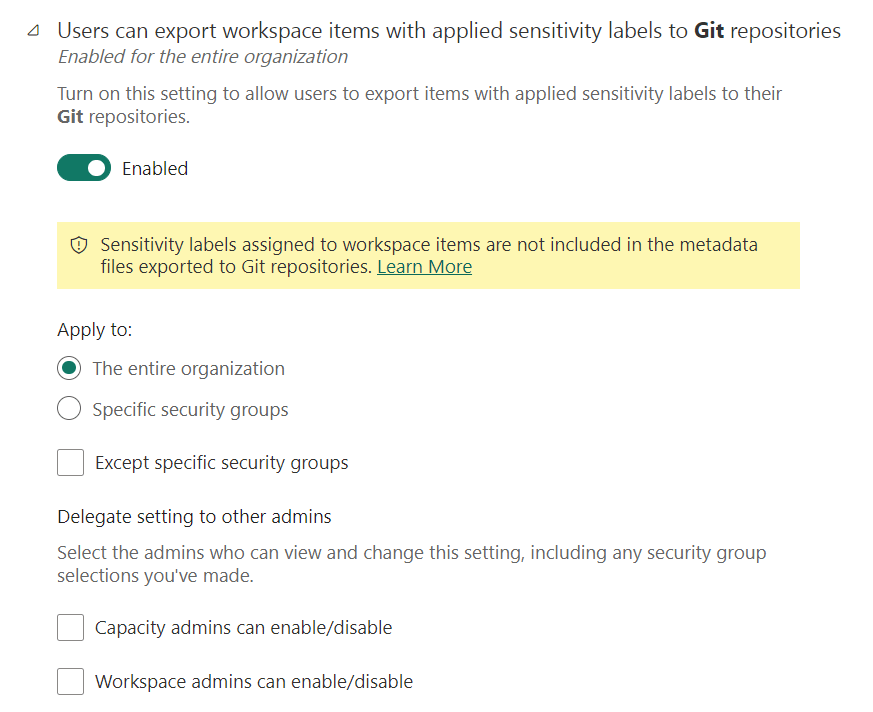
This option isn’t exactly clear in it’s wording. If you read the entire screenshot, you’ll deduce that this setting allows resource that have a sensitivity label applied to them to be exported to Git repositories, but it will lose the label in transit.
In other words, if you have an item with a sensitivity label attached to it, for instance HR, and this setting is disabled, this item will not be taken into account when synchronising your workspace with Git. If you enable this setting, you can synchronise it but the label won’t be synchronised. This means that when you create a new workspace and pull the items in from Git, you will have to apply the labels again. In cases like this, you can also look into promotion pipelines.
Users can sync workspace items with GitHub repositories
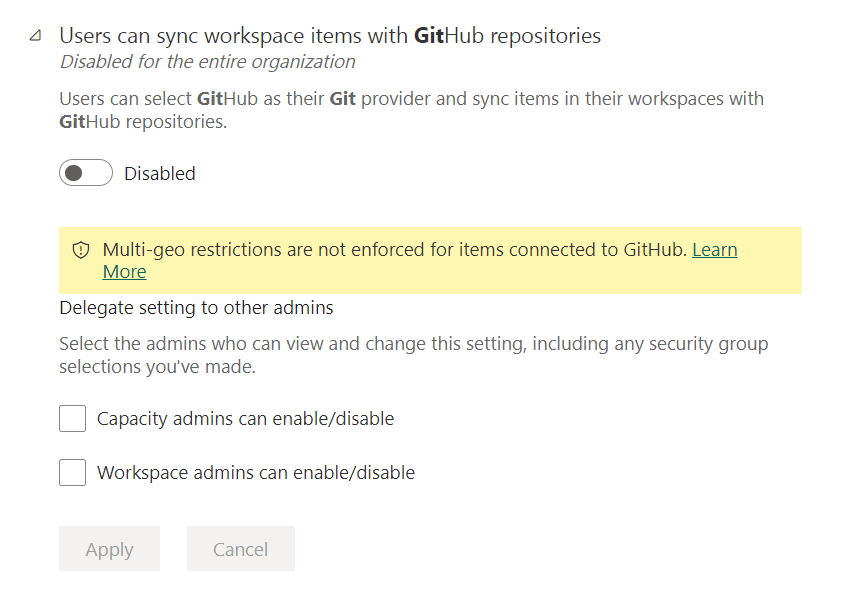
As this link will help you understand, you can limit the usage of Github specifically. As shown above, there’s a difference between Github and Github Enterprise; Github has a specific data location in the USA, Enterprise offers you a choice of data residency. This means that if you want to enforce the location of your Git data, you would probably disable the permission to sync data to a Github repository and therefore only allow Github Enterprise or Azure DevOps. Combined with a limitation on the location of your data, you should be good. Or not. Please test this one thoroughly with non-sensitive data.
What about those workspaces?
After your admin, or you, configured the Git settings, it’s time to check out the workspace settings.
When you open the workspace settings, there’s a nicely designed icon depicting branches. This is the one to look out for when you want to look into the Git settings.
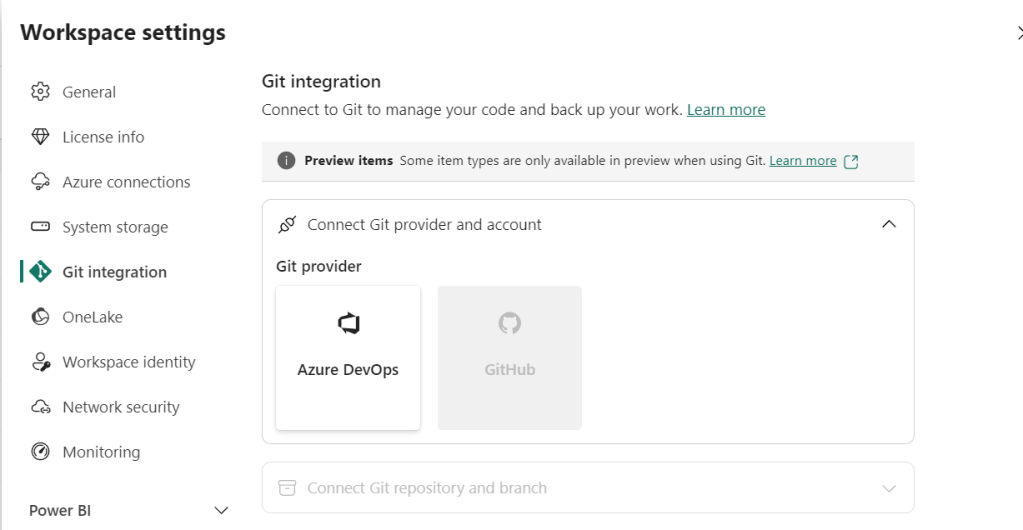
As the Fabric admin disabled Github, it’s not possible to connect to Github in this example, I’m only allowed to connect to Azure DevOps.
When I click on the Azure DevOps logo, the screen changes slightly.
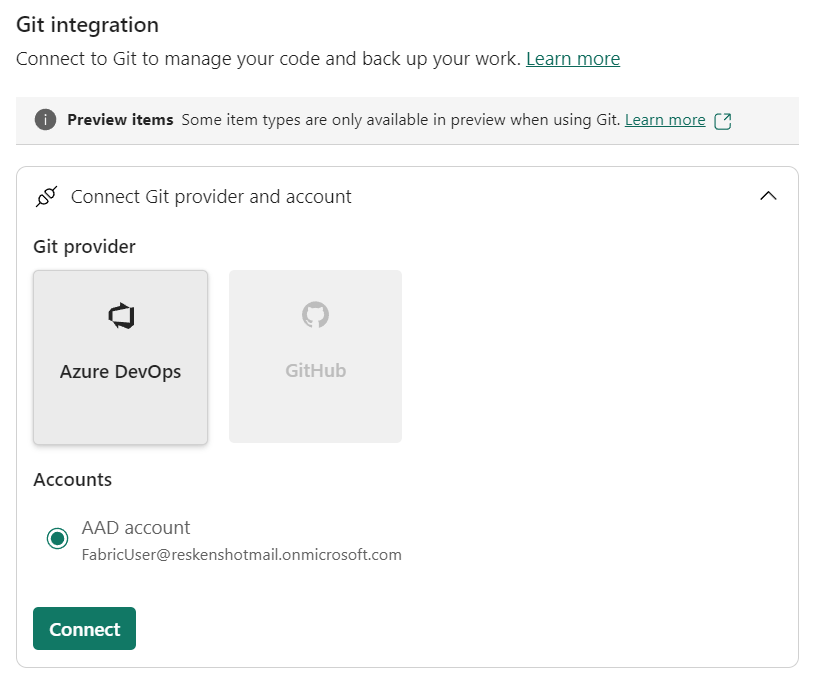
The user you’re using in Fabric needs to have access on its own account to get into the DevOps organisation. There’s no user impersonation possible.
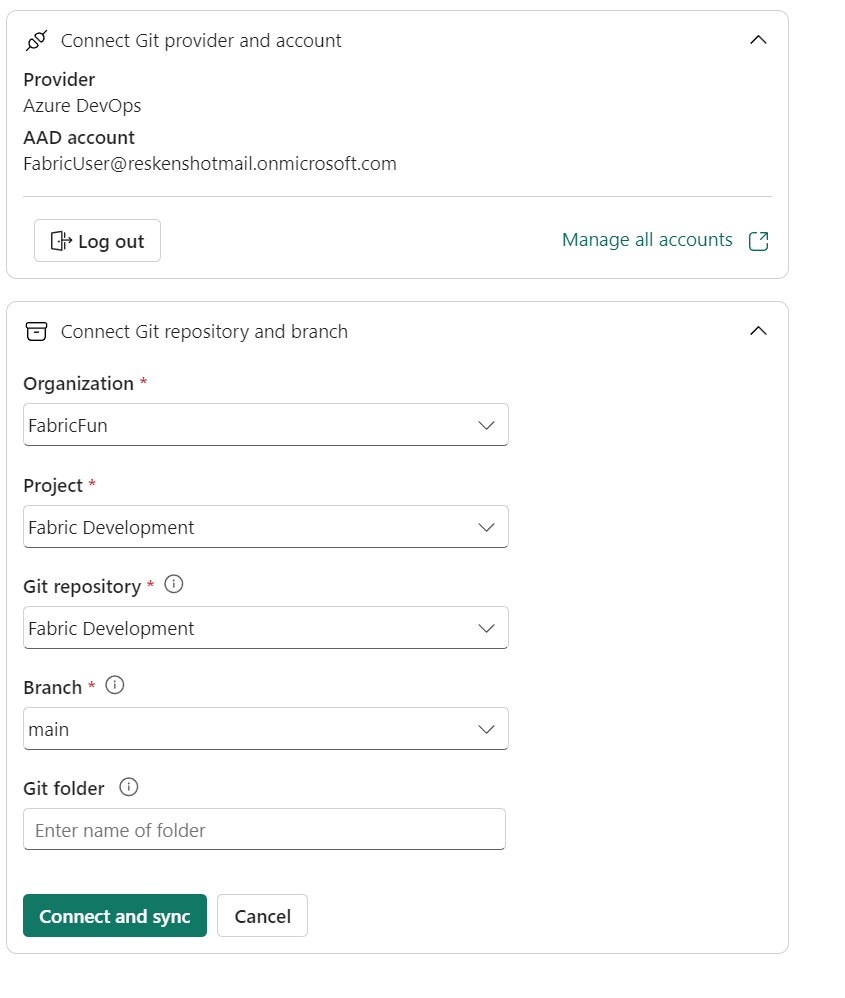
After you connected with Azure DevOps, you need to choose the Organisation, followed by the project, the git repository in that project and finally the branch. The Git folder is optional and can be left blank.
Click on connect and sync and you’ll see this in the top right corner of your screen.
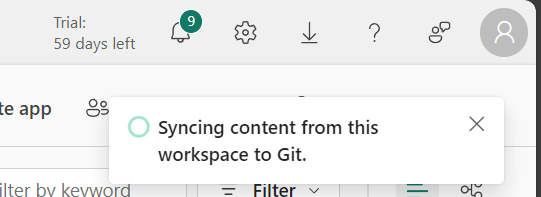
You’ll see the same in your workspace
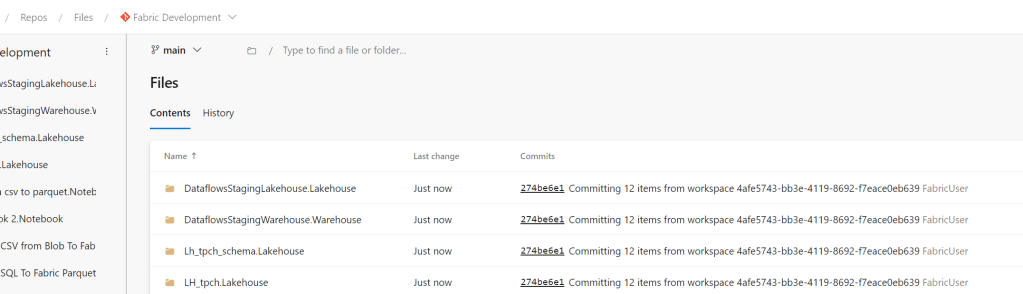
In your DevOps project, you can see something like this (of course depending on your excellent work)
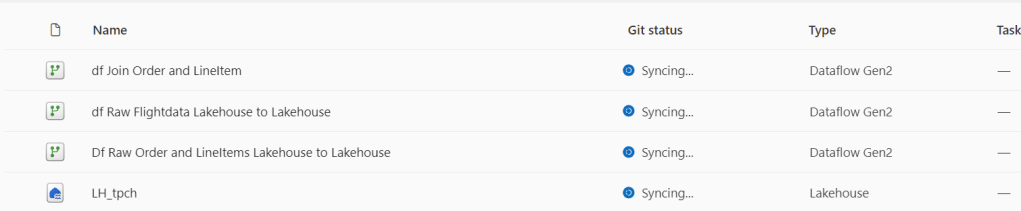
When it’s all done, in the top right you’ll see this:
And in your list of items:

Some items are not supported. Don’t blame me, I can’t fix that. It will most likely will be in the future. Quite soon too I hope as, for instance dataflows Gen2 offer some great functionality, especially if you’re not a hardcore coder.
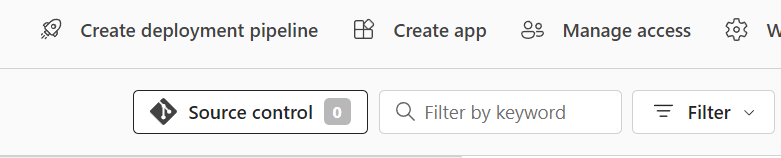
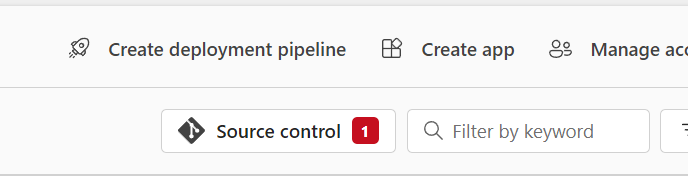
Changes
What happens when you change a file? Let’s change a file to see what happens in the portal.

You can also see this in the top right corner
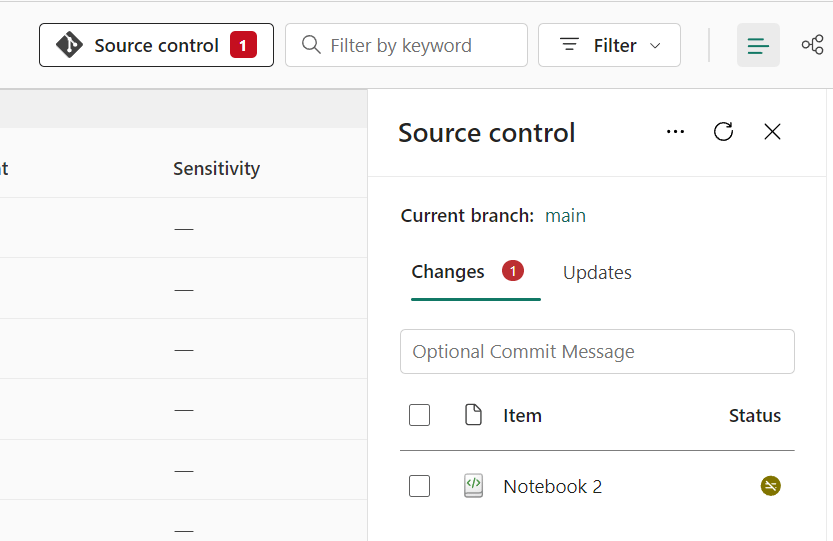
Click on this button and you can see the following screen
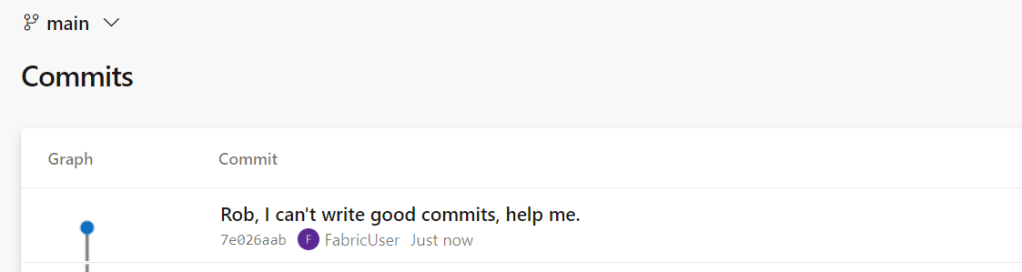
Make sure you create a sensible commit message. If needed, ask the bearded Rob Sewell for a lesson on useful commit messages.
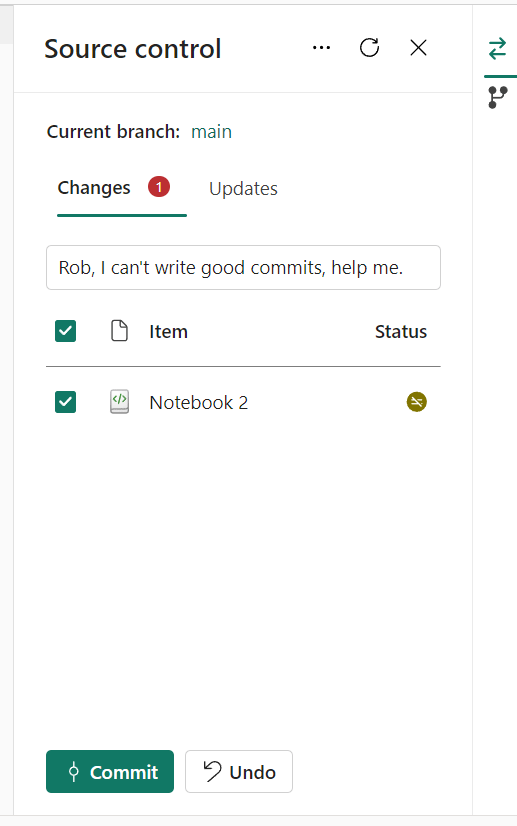
Click on Commit
And now the change is in your repository. In this case, I committed straight to the main branch which isn’t good practice. It should have been a development branch with a name directly related to the fix or sprint or however you want to manage your branches.
Video
Now, it’s video time, join Valerie to learn more!
Concluding
In this blog, you’ve learned some basics of version control in Microsoft Fabric, and some little extras as well. Version control isn’t hard itself, but there are some intricacies when you work with it. In the end, it will be worth it for your code will be cleansed of comments “to save old code for later” and can help you quickly revert to a working set of code if needs be.

One thought on “DP-700: Configure version control”