In one of the earlier blogs, the topic revolved around everything Git. Git is a version control system where you can leverage CI/CD. I love Git, even though it has a habit of biting me severely in the parts I use to sit on.
If you’re not well versed in Git or have no option to use Git to move code from development to test for instance, there is an alternative. If you’ve been using Power BI, the term deployment pipeline will be familiar for you.
What are deployment pipelines?
To put it very simple, deployment pipelines can move your items from development to test to production. By default, you’ll get three options or stages: Development, Test and Production. If you’re going full DTAP or even more than that, you can add those manually.
With a deployment pipeline, you can develop your code in a development workspace and when you think it is good enough, you can deploy the code to the test environment. There it can undergo rigorous testing by peers, clients or (worst of all) professional testers. When the testing is complete, it can be deployed to production.
Where to find this magic?
If you’re logged into Fabric, you can find the following three dots at the bottom of the left menu bar.

Click on them and this appears.

Click on the rocket and the following screen appears (almost like a smart wizard):

The screenshot you see here can be different in your environment, depending on the moment in time, the size of the moon and if Starship Enterprise is docking at Neptune or not.
Anyway, click on the green button to create a new pipeline. Remember, this isn’t a pipeline you can use to orchestrate your ETL processes but it just controls the flow of items between workspaces.
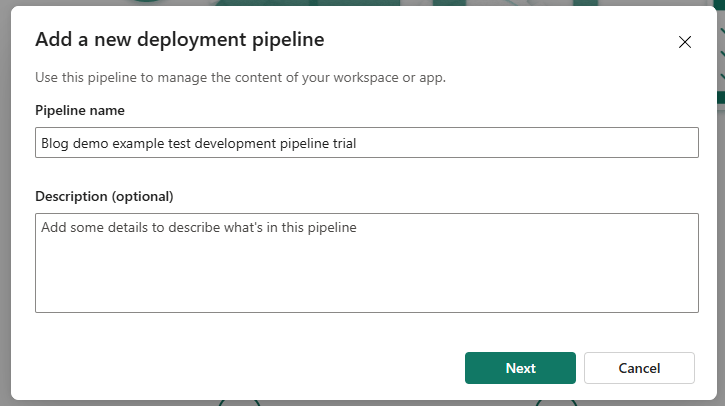
Create a sensible, meaningful name for your deployment pipeline. Only use silly things when trying things out so they do stand out from the serious production stuff.

As you can see in the screenshot above, After the default development, test and production stages, I’ve added a fourth one. Just to show that you can. You can rename stages as well, just do with it what fits your way of working.
Now what?
After clicking create, you’ll end up in a new window with something like this.

So, time to add some workspaces!

Click on the drop down thingy and the list of supported workspaces is shown. There’s also a link to Microsoft documentation on why some workspaces might not be shown. The link will show you why. As these limitations are usually quite prone to change, here’s the link to the latest version of the docs.
When you’ve selected a workspace, you need to assign it.

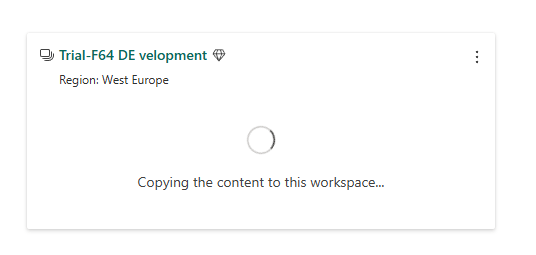
When you click on it, processes will run in the background and, depending on what you’ve stored in your workspace, a message like this can appear.
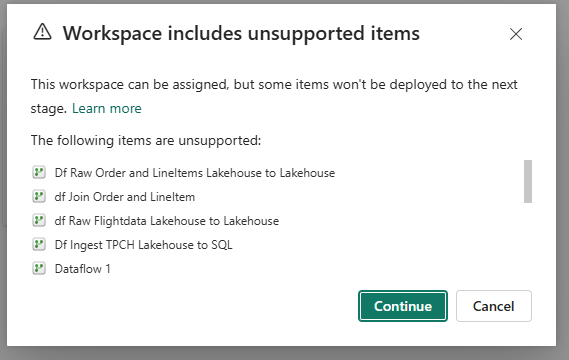
When you follow the link, you might be misdirected. You can find a list of supported items on this page.
If you cancel, nothing nasty will happen. But you will have chosen to not use the deployment pipelines. If you continue, a screen like this can appear.

Second stage
One stage to rule them all only works in tediously long movies, so let’s add a second stage.
When you’ve added the second workspace, you can see this happening between the workspaces.
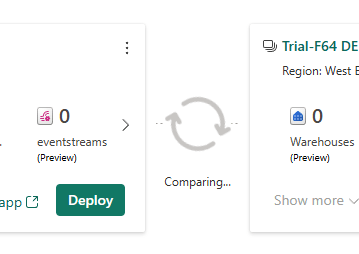
When the comparison has finished, you can check the differences by clicking on the double door icon.
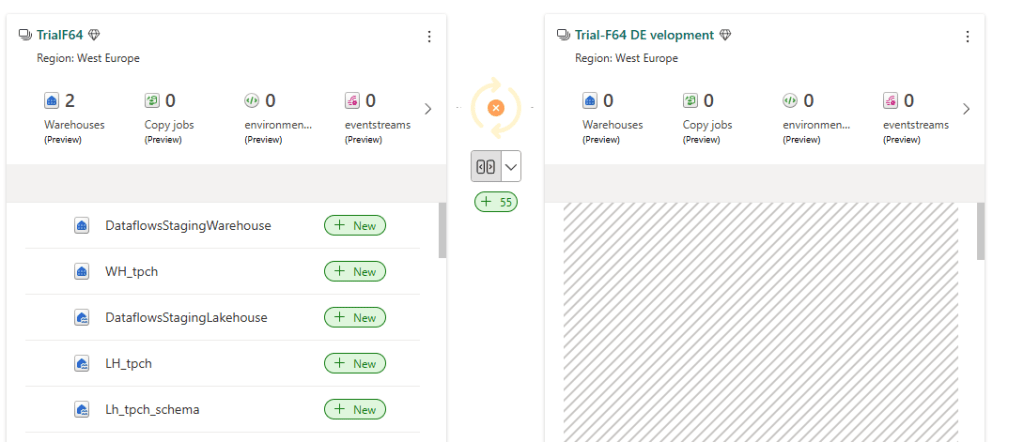
It looks like there are 55 differences between both workspaces. All I need to do is click on deploy in the Development stage to promote the supported items to my test workspace.

Again you’ll see the message that some items are unsupported. Click continue and the next confirmation message will appear.

Click on deploy again and this will happen.
This proces can run for an unspecified amount of time and then it’s done.
After it’s done, you can check out the history.

And this shows the following details

If you created a note at the time of deployment, you can review it here. You can see a deployment note as a commit message; what are the fixes, new items or reasons the deployment was run.
Should you use deployment pipelines?
Yes you should, if it fits your use case. As there are some idiosyncrasies, just like git has, you might want to dig into them and find out which method fits your environment. In preview (at the time of writing) is the option to mix git and deployment pipelines, more info here. Preview features are usually not part of the certification exam, but it might still be worth reading up on this.
Video!
After reading through all this, let’s run through it again, but now fully visually leveraging the talents of Valerie!
So, there you have it—deployment pipelines, your trusty steed for moving content from dev to test to prod without breaking a sweat (or a build). Whether you’re a Git guru or just pipeline-curious, this approach keeps you in control and your testers happy. Now go forth and deploy responsibly—your production environment will thank you!

One thought on “DP-700 training: Create and configure deployment pipelines”