Now that’s a long title! Luckily, this concept isn’t really hard so you should be in for a smooth ride today.
What is this easy thing?
Well, to put it quite simple, you can add three labels to items in your Fabric workspace:
– Promoted
– Certified
– Master Data
In my view, there’s an order to these three. You can agree to disagree but I’m still going to walk these three in ascending order. If you look at the official documentation, you can see the same hierarchy.
Promoted
This label shows all the users that the item with this label is promoted from just a report or pipeline to one that should be seen by most people in the organisation. In your opinion, other people in the organisation should use the item.
Certified
This label is a level up. Not only is this showing the item is very good, it also shows that it abides company standards. Because of this, not everyone can apply the certified label. First, it needs to be enabled in the admin portal of Fabric. Then I’d strongly urge you to let only a subset of people have access to applying the certified label. Make sure that this label has value.
If you do not have the permission to certify an item, there should be a link visible helping you to documentation how you can get your item certified. When the administrators haven’t created a webpage with steps how to achieve this, you will be redirected to the standard Microsoft Learn page on endorsement of items. In that case you’ll need to contact another human in your organisation.
Master Data
This label can only be applied on items containing data; lakehouses, warehouses, eventhouses and fabric sql databases. When you apply this label, you’re stating that this items contains the single source of truth for your organisation. This is not a label I’d expect to see in your development environment. If you’re working with a medallion architecture, you can start an argument if the bronze/raw layer is master data (as it’s the representation of the companies IT systems) or that the gold/presentation layer is master data (as this is where the end users will create their reports).
Again a permission that should be made available to a small subset of people in your organisation. And again, there are either specific steps available in your organisation to label your data as master data or you’ll be redirected to the Microsoft Learn page. Again, talk to other humans in the organisation, there’s no other way.
Enabling in the Admin portal
So, to enable the settings in the Admin portal you can either start the not so fun task of searching for the options or use the, excellent, search bar in the top right of the portal.

Click on the Endorse text and this shows up.
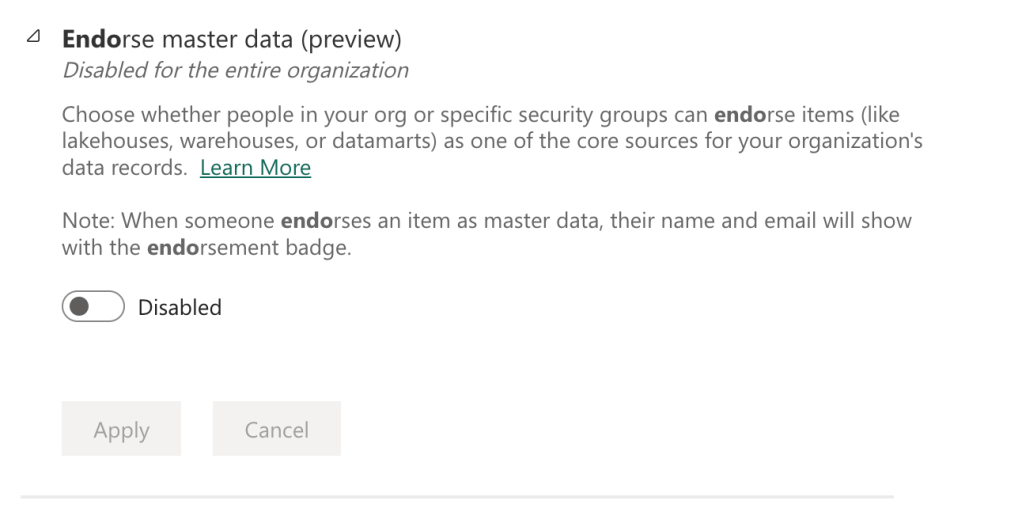
And you can enable it for the entire organisation or a subset. Again, I’d strongly advise you to do this for a security group with a small number of members.
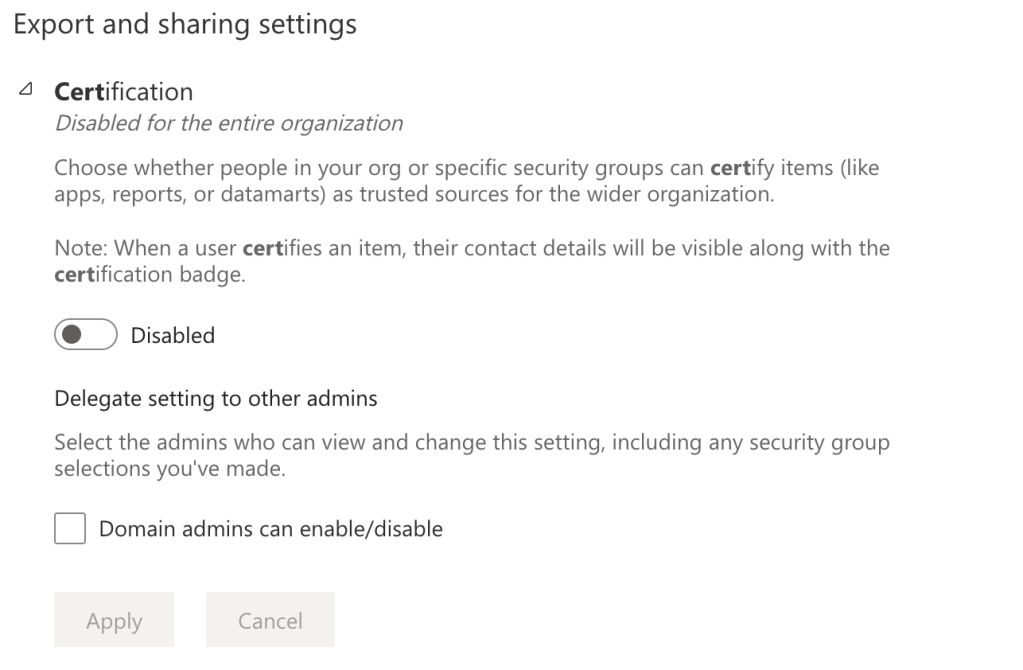
The same goes for the certification part.
Not enabled, then what?
Suppose your admin isn’t convinced and doesn’t enable the certification or master data option, what happens then?
If you go to the settings of an item, you will see this:
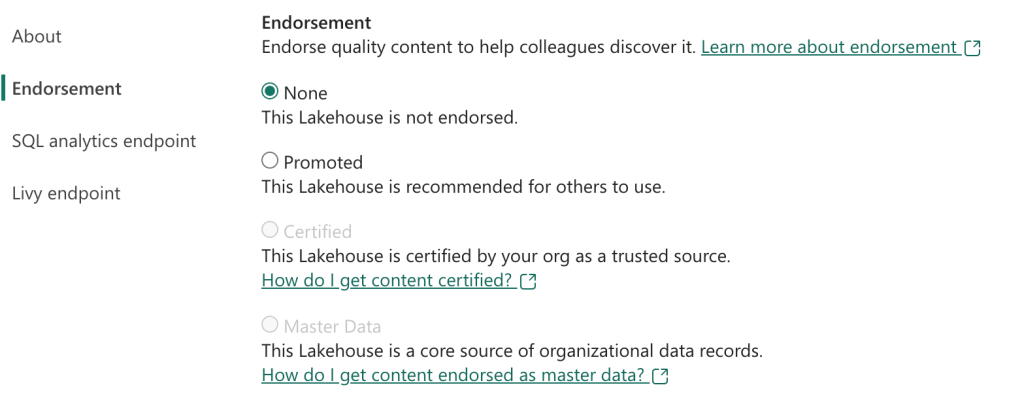
Both Certified and Master Data are greyed out. Also, if the options are enabled but you’re not allowed to do this, you’ll see the same. And as mentioned, the links should be set in the admin portal or they will go to the learn website.
Enabled
If the settings are enabled and you’re allowed to change the settings, you can click the radio button and magic happens.
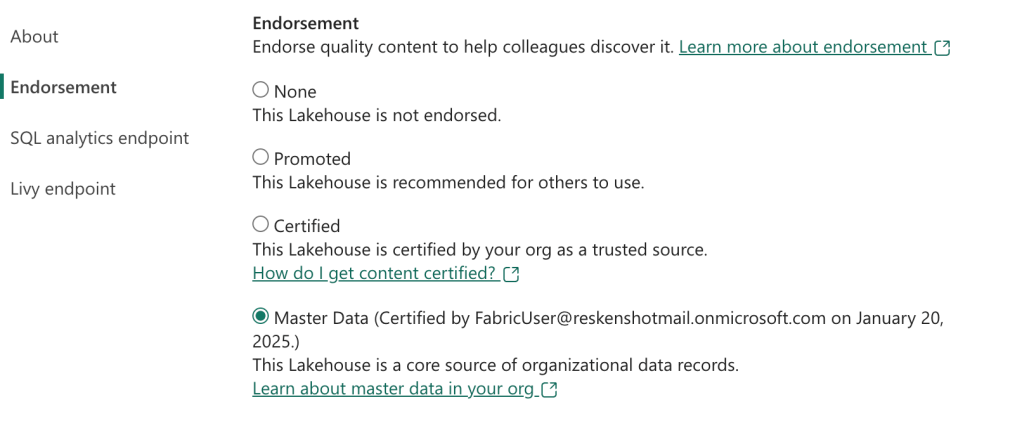
Not only can I click it (Yes I can), but it will also show who did this and when. So make sure usernames in your Entra ID make sense and don’t use a silly alias like fabric user. Oh wait…

As you can see, the Endorsement column in the list of items now has a Master data label attached to it.
And that’s all there is to it; from no label to certified or master data in a few clicks.
But, why?
Good question! One of the benefits is that you can search on labels. For small workspaces it won’t help much but when you workspace has many items it can help you finding the endorsed items.
Browse
On the left sidebar in the Fabric portal, there’s a browse button. Click this and you will see a screen filled with all the items from all the workspaces you have access to. Real fun, but now that you start applying labels, you can use it as a filter too.
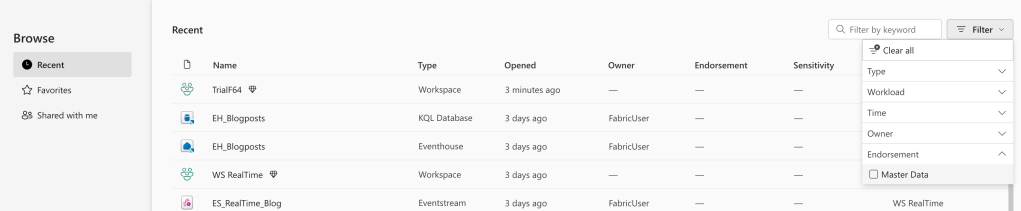
On the bottom right of the screenshot you can see the checkbox to filter out all items except the ones with the master data label. This will give you a quick overview of the master data items and, when applied, all the other labels too.
And this is also a nice step in the area of data governance, master data management and, in the end, ensuring data quality. A number of very difficult subjects
That’s why
Now you know, now you might have some work to do.
Video!
Or, make sure you understand these points and watch the video created by Valerie on this subject.

One thought on “DP-700 Training: endorse, promote and certify your items”