In the previous blog post, I wrote about workspace-level Access. With the four levels of access that can be defined, this wasn’t too hard.
Let’s make it a little harder and see if we can prevent mishaps in the different items within our workspace. In other words, let’s regulate access to the different items because not everyone needs Admin access—no, not even you!
First lesson
If you’re the one in charge of security on the Fabric workspace or even the tenant, you need to learn to say no. Yes, you really do. Anyone and everyone will come knocking on your door asking for admin access. Why? Because they need it, so give us the keys, open the door and let us do our job. Please, if you’re lucky.
Most of the time, their job isn’t admin-related; it’s more data admin-related. They need to see all the data—sometimes not even all of it. At times, they just need a subset of the data. Why would someone working in accounting need to see all the data from human resources?
Always ask why they need access and ensure someone senior will back them up. Or ensure you follow the processes in the various ISO and NEN certifications. These can help protect information and trace who required access with a reason behind it.
To Fabric!
Now, time to dig into the different item level access methods and options.
When you click an item in Microsoft Fabric, make sure to check if there are any extra options available. I’ll be honest: In my opinion, there’s way too little granularity by default to grant or revoke permissions to different items. But this is my Azure Administrator persona speaking, where I can easily limit access to different resources.
Lakehouse
When you press the three little dots next to a Lakehouse, you’ll find the option to manage permissions.
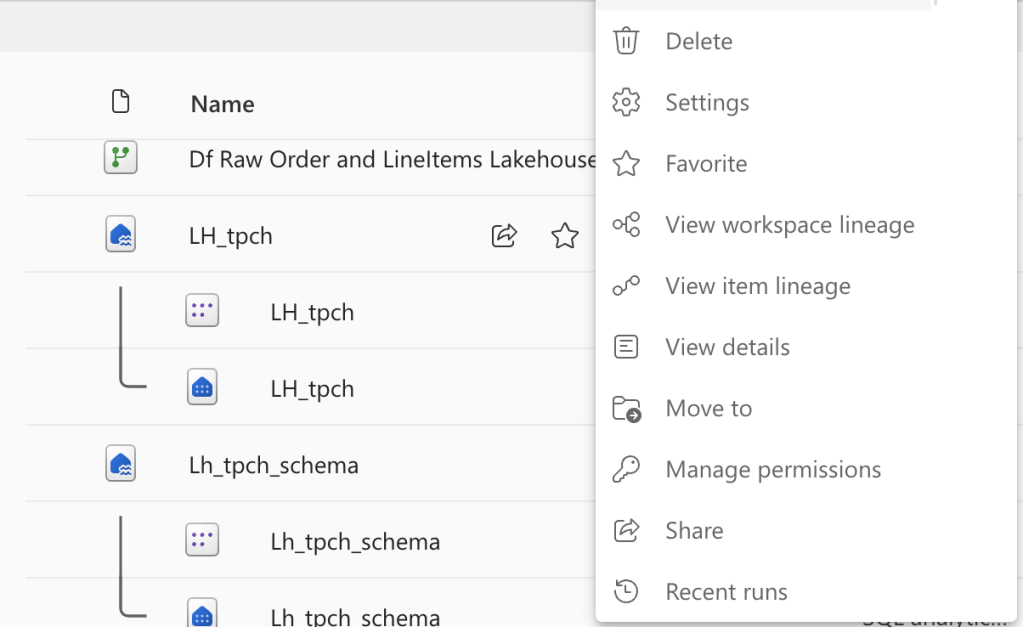
Click on Manage permissions to find the available options.
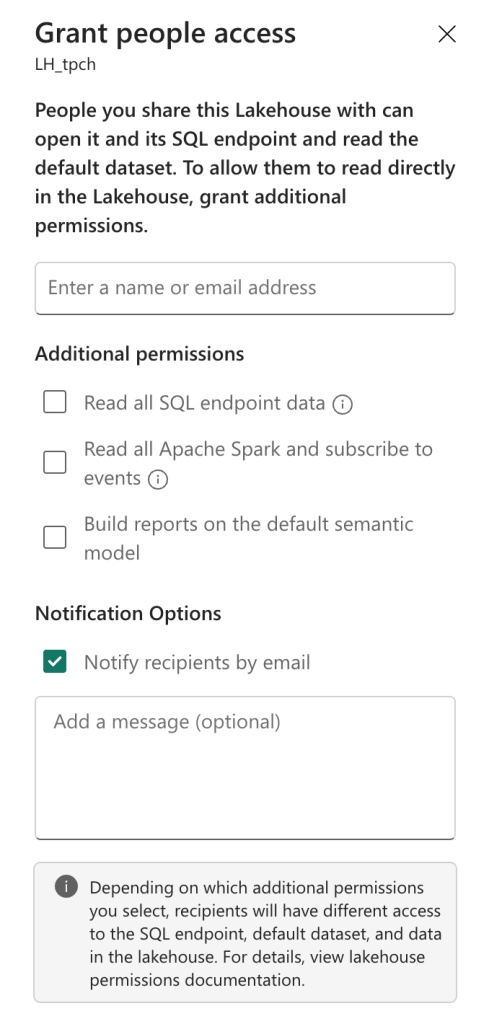
You can grant people access to the SQL endpoint, read all the Apache Spark, subscribe to events, and/or build reports on the default semantic model.
When you grant access to the SQL endpoint, remember that you will need to configure access to the underlying data. Users will see either everything or nothing, both of which are unwanted in the scenario where you’re configuring access at this level. So, make sure the access is set to match the minimal requirements.
The second option allows you to access the underlying data files using Apache Spark. The last option feels moot, as the default semantic model shouldn’t be used to create your reports; there should be specific models to suit your reporting needs.
Warehouse
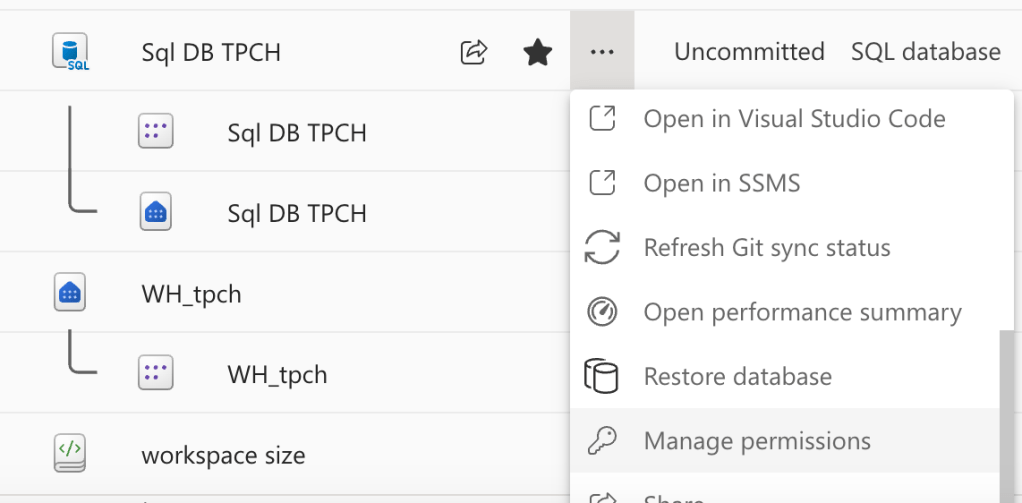
The Fabric Warehouse offers many more options.

As this is an SQL-based experience, users can also monitor and audit queries and even reshare granted permissions. As the SQL Endpoint allows users to add and modify data, please ensure the permissions are set accordingly. The last thing you’d want to see happening is someone running an update statement without a where clause. Be honest, we’ve all been there, right?
Eventhouse
Let’s move on to the Eventhouse and check out the item-level permissions here.
So yeah, there is no management of permissions here, which feels weird. In my specific case, I’ve set this one apart in a different workspace, but still. Create an Eventhouse, and access is determined by access to the workspace.
Fabric SQL Database
Finally, let’s see if the database has any top-level settings.
I had to scroll down a lot, as the SQL database has a plethora of options, but it’s there!

There’s something here to be aware of. You can connect to the Fabric SQL Database using the SQL Analytics endpoint or the SQL database. These are two different connections; the endpoint is the mirrored or replicated data in OneLake where data is stored in delta parquet. The database connection points you to the actual MDF and NDF files. The ones that are updated immediately and behave like a database should. It sounds like a semantic argument, but believe me, it’s much more than that. So make sure you know which connection you’re offering to the end users, it being the database one.
Notebooks
With the notebooks, you can set some permissions too! Apart from permissions, you can share a link to the notebook with other users in your organisation.
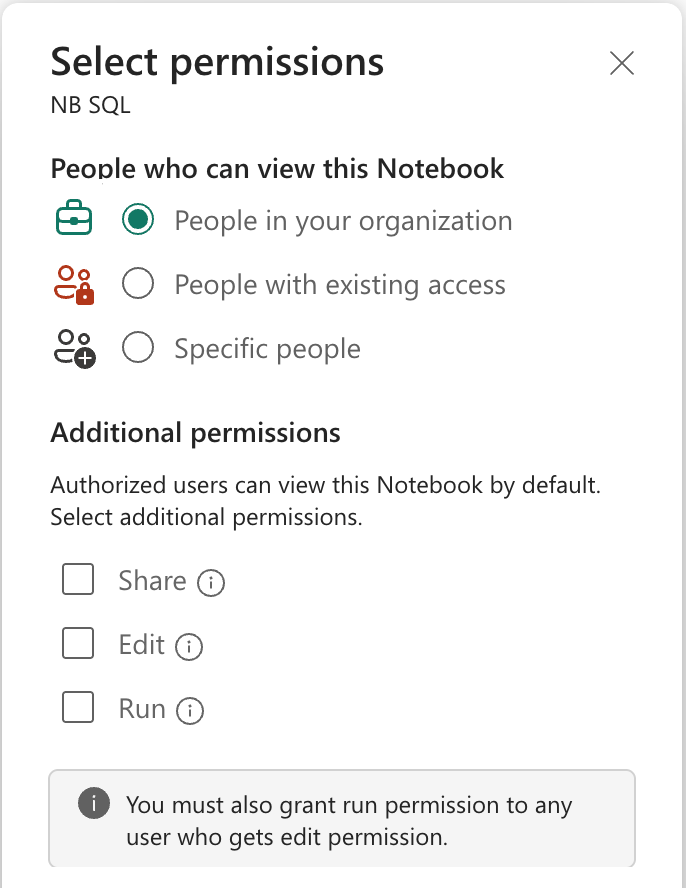
In this case, I can share this specific notebook and allow other users to read it, edit it or even run it.
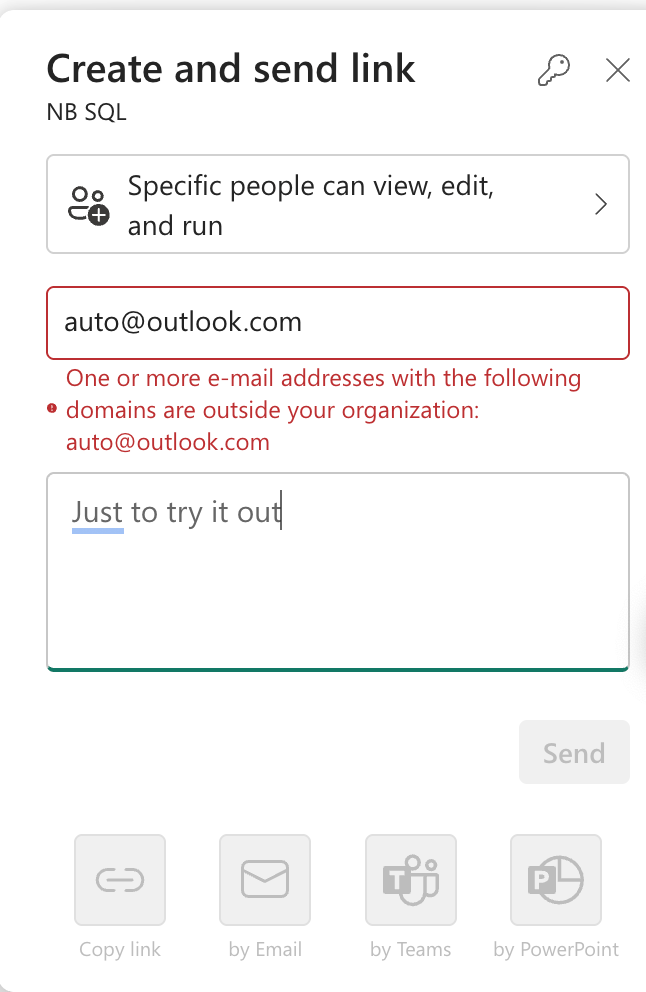
The thing is, there are some limitations. You can’t send it to anyone outside your organisation, which adds a layer of security around this. I like this, to be honest.
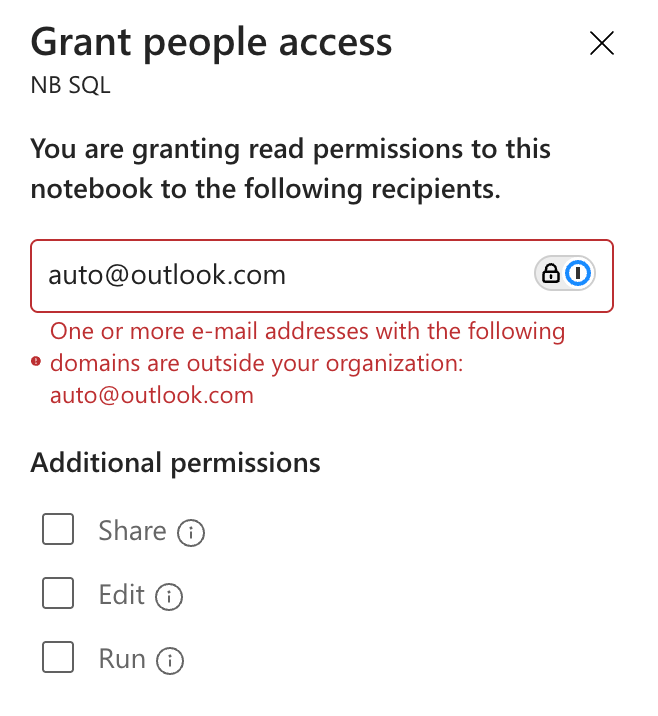
As you can see, just like sharing a link, a user needs to be part of the organisation to access the notebook. The permissions are identical: read-only, share, edit, and/or run.
Alert!
Before we move on to Valerie’s video, please be aware of all the implications a setting can have on your data. I know that people will always ask for more access. I know that with their current access, ” they can’t do their job”. But remember all the headlines you’ve seen in the newspapers about data leaks. Whatever you do, make sure your company doesn’t make it there.
Video!
Now, time for some video learning as the always amazing Valerie has created a video to explain all of this to you.

One thought on “DP-700 training: Item Level Access”