“tap tap tap”. Your attention please, we’re going to orchestrate our ETL/ELT process!
Yes, it’s time to unleash your inner Herbert von Karajan and make sure your BI orchestra performs at its best.
Why?
Well, unless you enjoy waking up every night to start your Extract-Transform-Load (ETL) process and manually running each process to do some work, it’s a smart move to automate this. Also, make sure everything always runs in the correct order. Additionally, there are situations where processes need to run in different configurations.
All these things can be done with what we call orchestration. It may sound a bit vague now, but we’ll get to the different moving parts of this, like parameterisation and pipelines.
How?
But, how can we do this? Good question! That’s precisely what this blog (and accompanying video) will try to answer. Before you dig in, be aware that no one silver bullet fits every scenario. Just as some companies prefer dataflows over pipelines or notebooks, and prefer warehouses over lakehouses, some companies prefer pipelines over notebooks when orchestrating their ETL process.
In my opinion, there is no best solution; there is a best fit. And it’s up to you to find the best fit. Some people even prefer third-party solutions or revert to building something themselves because that is the best fit. I’m okay with whatever you choose, as long as it saves you from having to do everything manually. Also, keep in mind that whatever you create must be documented both for support and for transferring to coworkers.
Using a pipeline
In my opinion, this is the easiest way to orchestrate your process. With a pipeline, you can call other pipelines to do some work (called invocation or Invoke Pipeline).

Essentially, you’re using one pipeline to call other pipelines to run in a specific order. It makes it easy to plan all your steps and add error handling. Every activity in a pipeline has different outputs (Skipped, succeeded, failed, and completed). Depending on the output, you can add other steps to handle this.
When invoking another pipeline, you’ll need to define which pipeline you want to run. Therefore, you need to know and have access to the workspace where this pipeline is hosted.

One thing to remember is that when handling errors in an invoked pipeline, it can return a successful message to the pipeline that invoked it. Make sure you handle this correctly to prevent data issues.
You can also invoke notebooks from a pipeline.
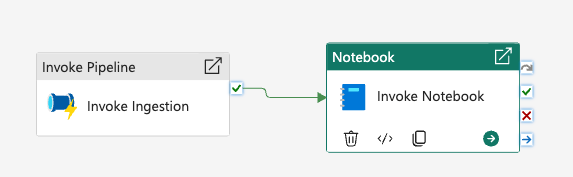
And, assuming you’re using parameters in this notebook, you can populate these at runtime. The parameters you need to fill out here must be in a parameter cell in the notebook. This is a special cell type that can be used only once per notebook.

Using a notebook
If you’re more into the world of code, you can use a notebook to orchestrate your ETL. You can create a notebook that refers to other notebooks and signals them to run. You’ll have to build your own error handling in the code itself and make sure you output enough data to help you resolve exceptions, issues and errors.
As an example.
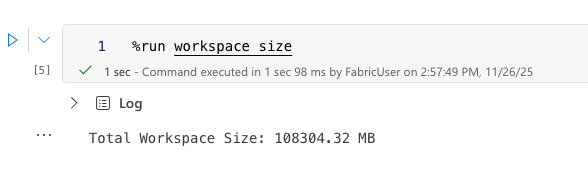
You might be tempted to add more than one notebook in a cell.
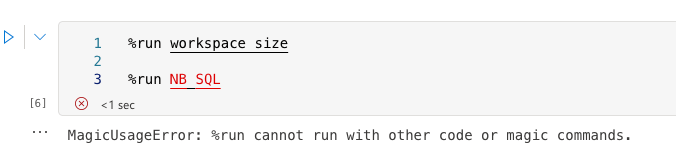
No can do, just one. The good thing is that by running one notebook per cell, you can control the order in which notebooks run.
Also, note that you can’t run any code other than a magic command in a cell. Trying to apply some logic won’t work. If you want to create variations of your workloads, you’ll need to use separate notebooks to support them. In the end, you’ll still need a pipeline to ensure a notebook starts running without manual intervention.
How to start a process?
There are a few options here. You can choose between a schedule (something you can create in the Fabric portal), an event (like a OneLake trigger), or, even though this is outside the exam, use an API call to start a process. This last one can be pretty helpful when building your own solution.

Create a schedule.
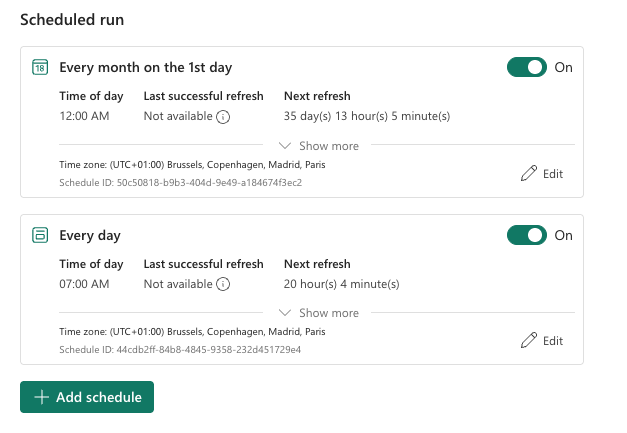
When you click the schedule button, a window appears on the right-hand side.

Click on the green button, and you can create the schedule that fits this pipeline.

And yes, you can create multiple schedules per pipeline!
Create a trigger-based event.
You can also use triggers to run specific pipelines based on events.

When you select the Add trigger option, a menu on the right opens again with many options. The most important one is the data source. A bit of a misnomer, as in my opinion, it’s the source of the trigger. When you select the data source, you’ll see these options.
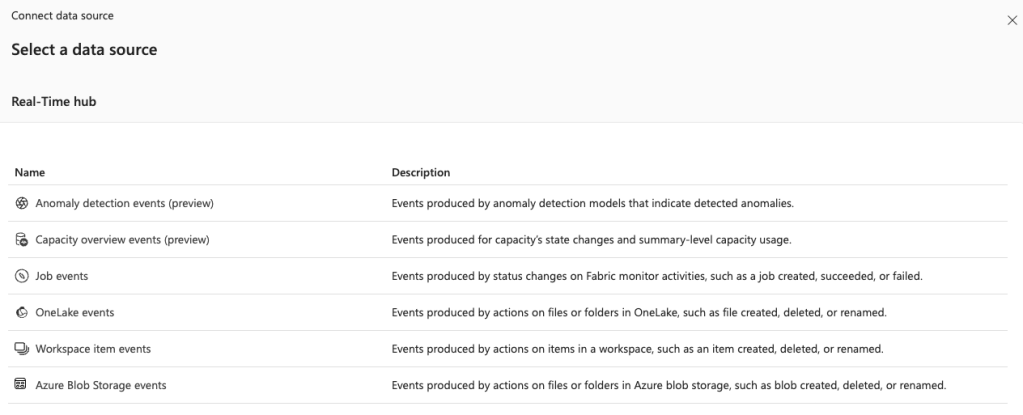
There are several options available. For instance, you can run a pipeline if a job fails. Or when files are added to either OneLake or an Azure Blob Storage.
Before you go wild, remember that a pipeline has to start to do things. If files are coming in at a high frequency, you’re better off using a Realtime Eventstream. But, if, for instance, the finance manager updates his Excel file with budgets and wants to see the results in his Power BI report, this is an excellent way to help this person out. You don’t have to respond to his Teams message, log in, start a pipeline and inform this person that the process is finished. With this trigger, it’s done automatically for you. And you can inform this manager that after uploading the Excel file, it will take a few minutes before it’s processed and available in his report. Just tell him to get a coffee.
After selecting the source, you can set what needs to be done.
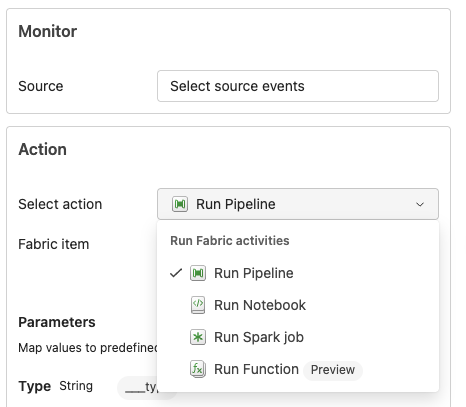
This helps ensure the correct steps are taken after the triggering event.
In the end, you’re creating a so-called Activator item, as you can see in the save location section.
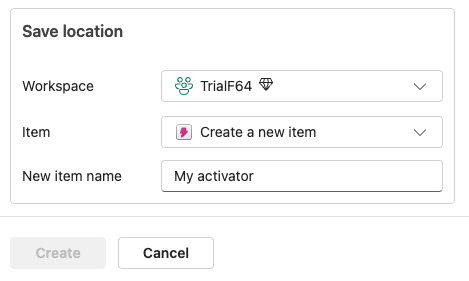
You can even save the Activator item in a different workspace. This way, you can group all your activator items together if you wish.
Parameterisation
One thing to keep in mind is that you can use parameters and variables. For instance, when you want to use incremental loads, you have to send a value to the source system to only get the latest rows. As sources usually do not allow you to add a marker that you’ve loaded a row, you have to come up with your own logic.
Another challenge can be separating office hours loads from nightly loads. Depending on the time of day, different processes need to run. If you really want to go wild, you can create a complete metadata-driven framework where everything is parameterised. Even though this looks really cool at first glance, it poses some challenges when it comes to supporting it and debugging issues. If you’re going down this route, make sure it’s not too abstract, and it’s still possible to hand over to less experienced coworkers without them having to study for weeks.
In the end, when an issue occurs during the weekend, you should be able to pinpoint the cause quickly.
One way to store parameters is in a Fabric SQL Database. It’s an excellent place as it offers (almost) all the functionality from T-SQL that we’re all used to and love and cherish. Right? Right. Also, it’s much faster to access than an Azure SQL Database via a private endpoint. Why, well, the connection needs to come alive with every request, and that takes time, whereas the Fabric SQL DB is just there.
Using a Lookup function lets you get the parameter values you need with just a SQL query.

You can either store them in a variable (but remember that assigning a variable is a billable event) or use them directly in the invocation we created earlier.

What you see here are the parameters from the Invoke Pipeline. There is a parameter called MyValue that is populated by the Lookup’s output.

This is the same syntax we’ve seen in Azure Data Factory and can be easily reused for this kind of purpose. In this case, I’m passing the output from my Lookup to the pipeline and letting the underlying pipelines have fun with these parameters.
Simplicity
Now, the examples above are very basic, and you won’t find them this low-level in the wild. But I would urge you to try to keep it as simple as possible. This really helps maintain your solution, explain how it works to others, and transfer it to others.
Video!
Great, you’ve made it to the end of this blog! Now you’ve earned the video created by Valerie on this subject.

2 thoughts on “DP-700 training: Orchestration”