
In a blog from a few weeks ago, I wrote about getting data from your on-prem SQL Server into Fabric. At the time, the only option for a copy dataflow was using a direct connection over the internet. It still is, but now you can also use the PowerBI Data Gateway to get data from your SQL Server into Fabric.
In this blog, I’ll take you through the steps needed and an issue I ran into.
Basics
The way it works is quite simple, you install the data gateway on your server, make sure the account you’re using matches the one in Fabric and before you know it, you can reach your SQL Server. It takes a few minutes to set up and you’re done. Easier said than done? I thought so as well but it really wasn’t that hard. I followed the steps in this link and, besides the time it took to install the correct .NET framework, a few minutes later the installation was successful.
Within the Fabric portal, I could add the on-premises data gateway in a few clicks.

Click on the manage connections and gateways link and add your data gateway.
But, the gateway in itself is empty. What you need are connections. You can add these in the specific connections pane of the manage pane.

When you add a new connection by clicking New, that’s where you enter a lot of information to connect to your data source.
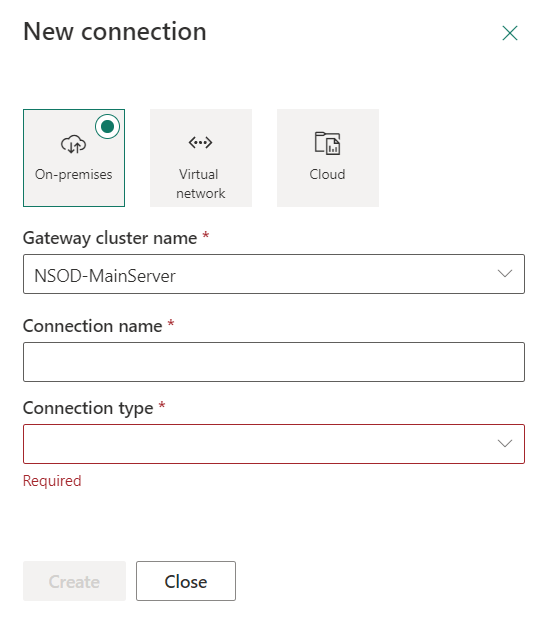
The first part is easy, select your cluster name (which is the on-premises data gateway), running on my server I first used for my session for the New Stars of Data event. Provide a functional name for your connection. The list of types supported is very, very long but keep scrolling until you find SQL Server.

This part requires you to fill in the name of the server and the name of the database. As you know, authentication is necessary as well, there are a few options here.
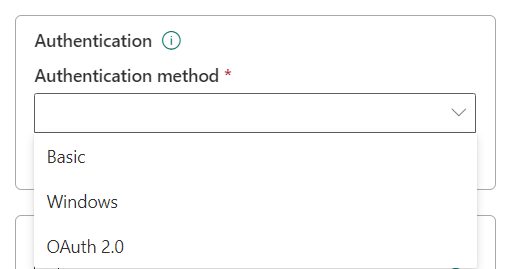
Basic means you’re using username and password, Windows seems to do the same though will probably require Windows credentials that are passed through to the database. The OAuth 2.0 authentication leverages integrated security with Azure AD (or so it seems when digging into that option. As my VM isn’t Azure AD domain joined, I can’t verify it right now).
Finally you can set the privacy level to determine at what level the connection can be used for scheduled refresh. A lot of terms on this page describing most of the settings are weird for me. I just want to get data from my on-premises source into my LakeHouse but the terminology is based on PowerBI reports which, in my world, are two totally different things.
Give me data!
If you want to get your data, the only available option is using a Dataflow gen2. So you select the tables, publish the pipeline and off you go.
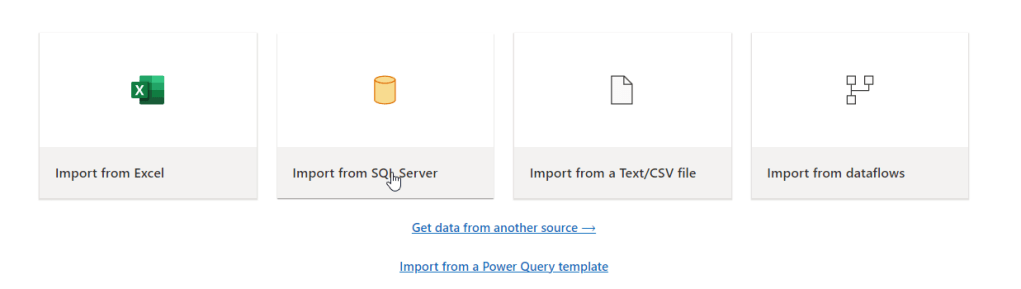
In the new dataflow screen, select Import from SQL Server to be able to connect to the database.
The first step has some magic. You have to enter you Server and database name. Until you’ve completed the information, you see this:
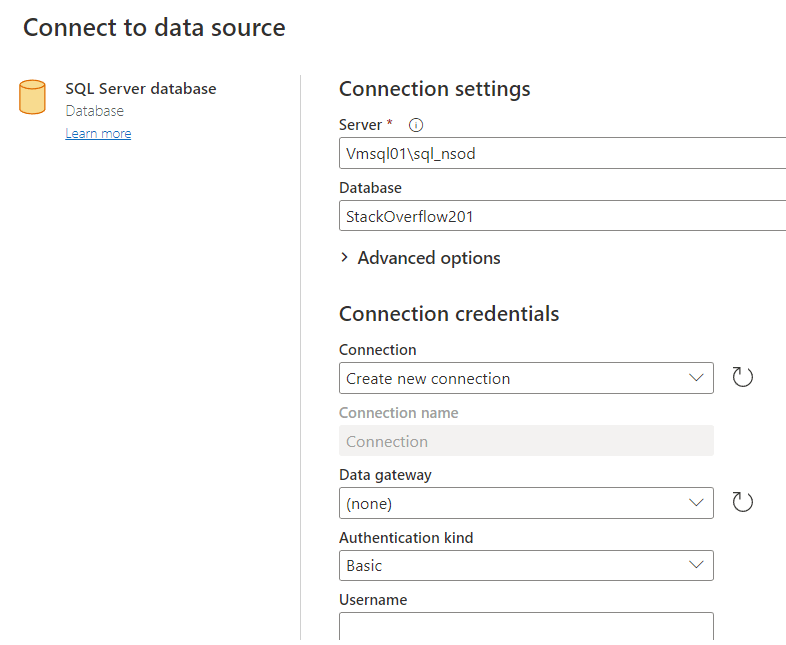
With all information complete, this happens:

The input recognises the server and database and joins the configured connection. Click next and:

There are my tables, almost like I’m looking in the SSMS Explorer pane. Nice! Select the tables you need and click on the Create button in the bottom right corner.
All you need to do is select a data destination. A bit hidden in the bottom right hand corner of the screen, you can find this:

For my line of work, the Warehouse or Lakehouse are the most logical options. It’s really cool that I can export the data to a Azure SQL database and can even think of some usecases as well. Moving data into Azure Data Explorer might hit home for some of you, though not for me.
All done?
Not really, in my first attempts, most tables missed most columns, making the dataset useless. So I went through the trouble of selecting every table, checking it’s destination in my OneLake and the mapping. And sure enough, all the tables came through. Well, all but one. My Posts table had too much data in it to be able to be transferred from the staging lakehouse to the real lakehouse.
Because that’s how this technique works; load all the data into the staging and then perform modifications if needed before writing it into your real OneLake.
That’s all nice and cool, but the performance plummets. My largest table has 3.729.195 rows, has about 6gb of data and takes about 32 minutes to complete.


What I really don’t understand is the fact that the data volume increases 8,82 times. It’s just a copy-paste flow. Nothing else happens.
So let’s just change one thing. Within the Dataflow Gen2 editor, you can right-click your table (source) to view a number of options.
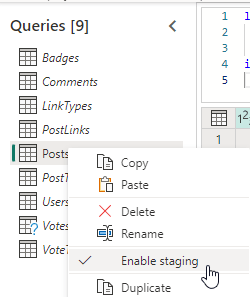
By default, the option to Enable staging is active. This results in the behaviour where transferring data takes a lot of time. Remove this checkmark and publish your dataflow again to solve this specific issue. This time, the underlying engine reads all the data and writes it back in the OneLake at speeds I’ve come to expect from Fabric. My entire database of about 10 GB was transferred in a little over 10 minutes. No errors whatsoever. The posts table?

Concluding
So, with some help from Microsoft who pointed out where I could find the mildly hidden staging option, I got to transfer my SQL data to my OneLake for further processing. It was a bit of a bumpy road but in all honesty, that’s what you might expect from a product in preview. I’m mostly relieved that I can get to my data without opening port 1433 to all of the internet. As the data gateway is already heavily used by PowerBI professionals, I can only assume the product is safe and secure.
Thanks for reading!

thanks for this. can you clarify what you mean by “make sure the account you’re using matches the one in Fabric”? I can’t seem to make the “pieces” of Fabric talk to each other. It’s frustrating.
LikeLike
Good discussion, But when I select multiple tables, I need to select destination for each of the source table separately. How to resolve this.
LikeLike
Hi Suman, that is where meta data driven pipelines come into play. There are many blogs online on how to create and maintain those.
LikeLike