Getting data from an API can be hard, especially when you’re trying to get data from a so-called Soap interface. This is a bit of an antique way to distribute data to online applications and has a lot of challenges. I’ve read a few blogs on this subject but funnily enough, they’re all using the same example. So when I was struggling with my API, it was somewhat helpful, but it didn’t get me over the finish line.
I’ll show you how to create the Azure Data Factory pipeline, the source, sink, mapping and the issues I ran into. Spoiler alert, not all issues were fixable. In the end, I switched to PowerShell for the data extraction, a script I’ll share in the last part of this blog. I’m going to show you a more real life example. You’ll notice blurring in the screenshots because I don’t want you to access this one and I’m lacking the knowledge to build a mock one myself.
The Soap protocol works with some standard parts. One of these is the API address, but what you really need is the WSDL.
The WSDL
The WSDL or Web Services Description Language, is the first link you need to have. Without it, you miss the key’s to the data. The WSDL will show you all the calls you can make, parameters that are optional and mandatory and might give you a description in what you can expect. A WSDL may look something like https://supplier.name/name/accounting.asmx?WSDL. This is the link you’re after to find out what an API has on offer. You can open the link in your browser to scroll through it, but there’s more to it.
This WSDL link can be fed into SoapUI. This tooling is essential, without it, testing will be a nightmare. Even though it looks like it was built for Windows 95, it works like a charm and you’ll soon learn to love it. And hate it because of the weird way it handles it’s internal windows. But you can get used to the latter. SoapUI offers you an interactive environment with tests to see if a certain call returns data. Or not. It will return the basic building blocks and massively increase productivity.
The vendor
The vendor is another essential part of your project, and not just because you need to know the WSDL and other links. You also need to now how many rows you’re allowed to extract from this web service in a single run. It’s not uncommon for vendors to block connections that try to read all the data at once. My example for instance has a connector for countries. There is a finite number of countries in the world and it’s not something that changes really quickly. I hope. These 300 records or thereabout won’t be much of a problem. A customers table on the other hand can grow fast. Getting all the data at once will be frowned upon and in general not a good idea. Just make sure you know how many records you’re allowed to get and build your pipeline accordingly. Because getting the data from the api in multiple runs is usually no problem at all. But make sure they’re going to allow your traffic. I tried loading all the data from the different API’s into the data lake and at some point an automatic process kicked in and killed all my connections. I had a good explanation what I was doing but then I had to find out how much data was loaded and what was still missing.
The pipeline
When you’re building your pipeline, and a copy data pipeline will do just fine to get the data from the API into your data lake. But you need a number of sources to get everything going.
Linked Service
For the linked service, use an HTTP connector. When you create it, the HTTP service can be found under the File tab.
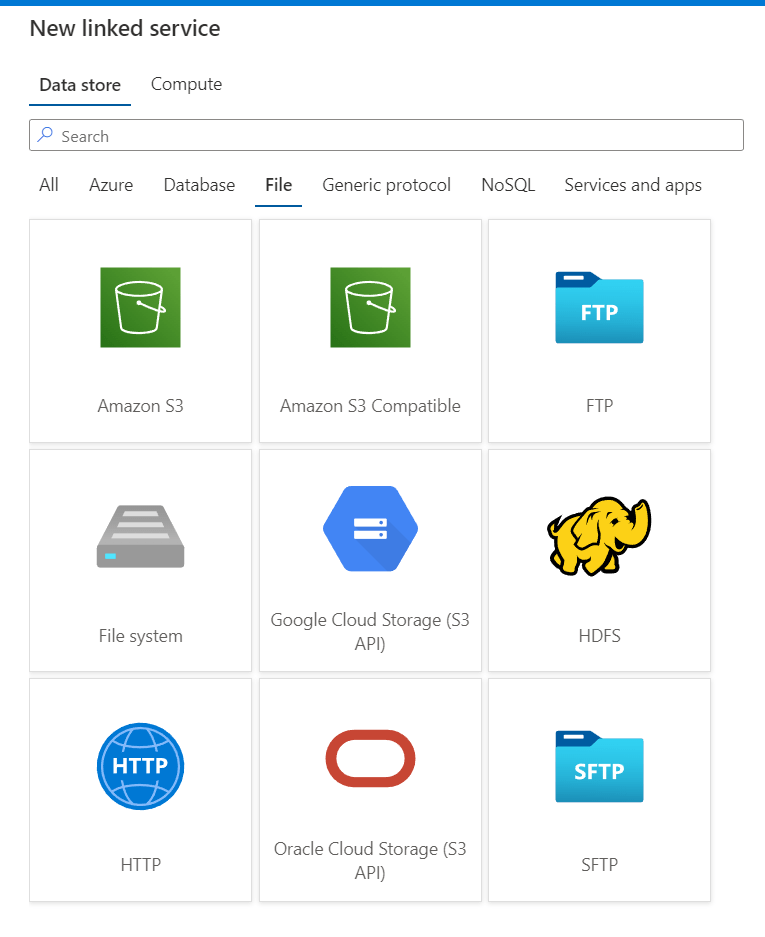
Click on the HTTP icon and continue. Next, fill in the basics from the SOAP service. This is the base url and the authentication that is expected from the supplier. Make sure you save the password inside an Azure Key Vault to make sure only people who are allowed to work with the data have access to it.
Data set
For the data set, use an HTTP connector again that uses the HTTP Linked Service and make sure it uses the XML data format. When you create the new data set, again the HTTP connector can be found under the File tab.
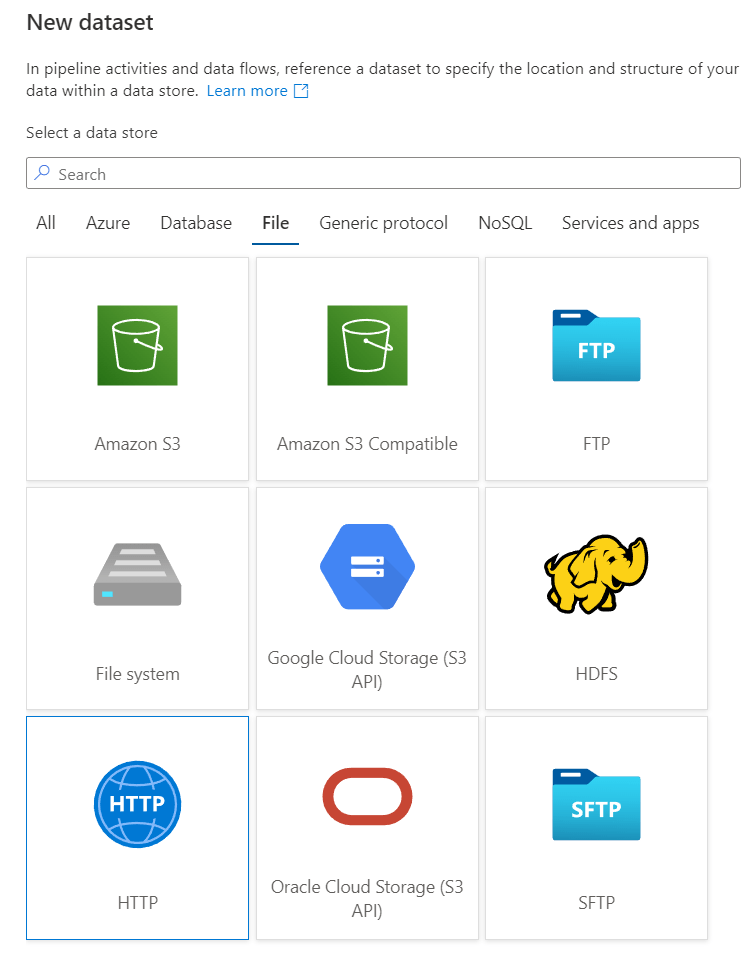
Click on HTTP and continue. Next, you need to choose the file format. Unless the vendor states otherwise, it’s usually XML that will be returned.
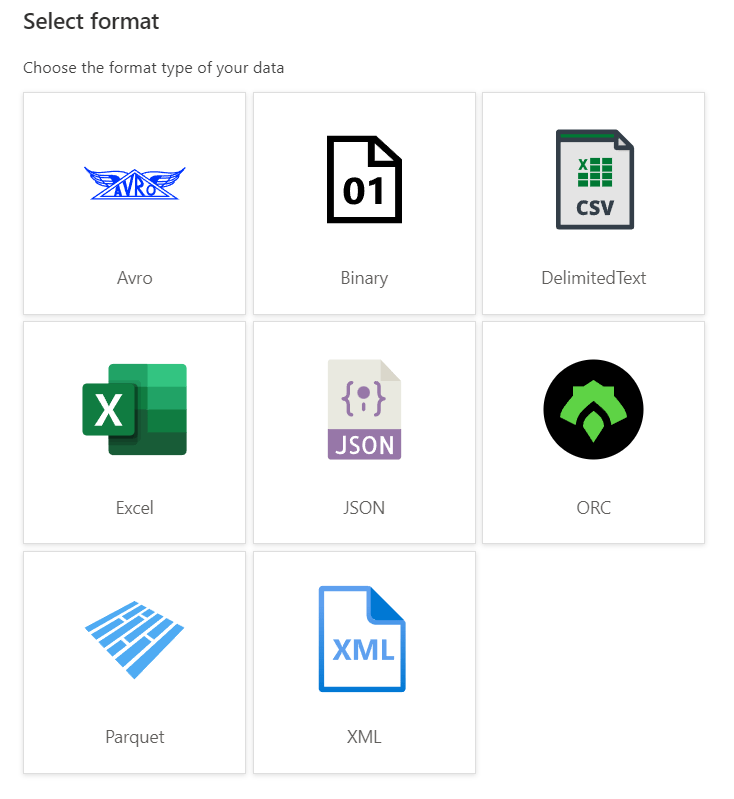
Click on XML and continue. Next, you need to give the dataset a name and connect it to the correct linked service:
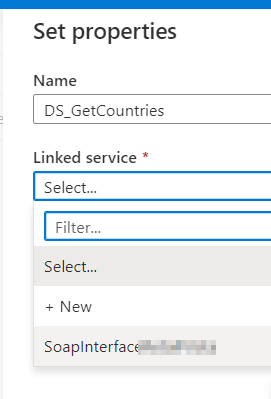
If all has gone well, you’ll see the screen where you can set the connection properties and parameters.
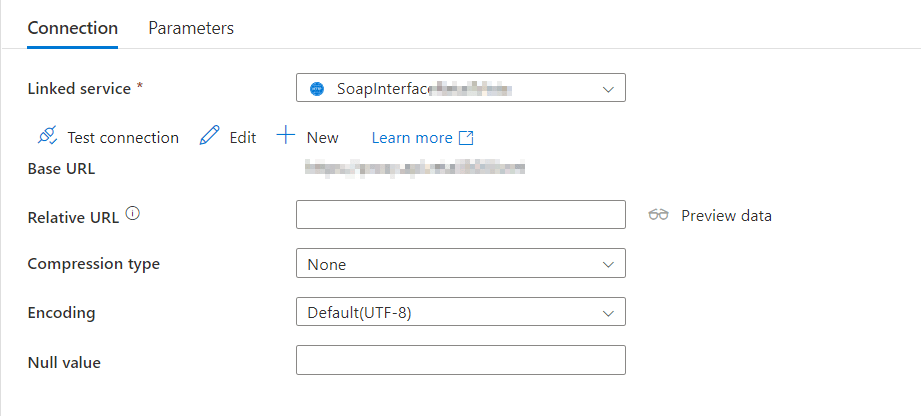
The linked service should be familiar, just as the base url. These are the values entered when you created the linked service. The relative url is the part that follows, so something like /API/Countries. Because that is the part where the data can be collected. Next you have to know if the API is giving out uncompressed data or compressed with something like GZip. Encoding is usually UTF-8 but again, verify this. Finally, make sure you know how to handle NULL’s.
Sink
The sink will be your data lake where the data will reside. As I’m using a data lake and with that a structure starting with raw data, I’m going to add some logic to the data lake.

My data lake sink has the datalake linked service. The container is called datalake. The basic folder structure is built dynamically.
@concat('raw\SourceSystem\',dataset().FileName)
This dataset().FileName is a parameter set at the parameters tab in the sink

Pipeline
Cool, we’ve got our source and sink, let’s build the pipeline. I’ve created one and it’s nothing more than this.
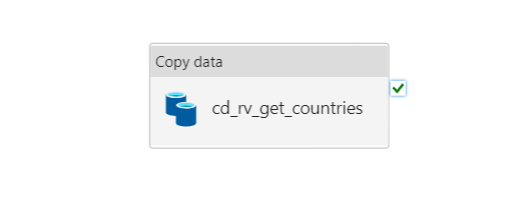
Easy enough on the outside, right? Well let’s open this up and see what’s inside this copy data pipeline.
Source
Going from left to right (and skipping the general part), let’s start with the source.
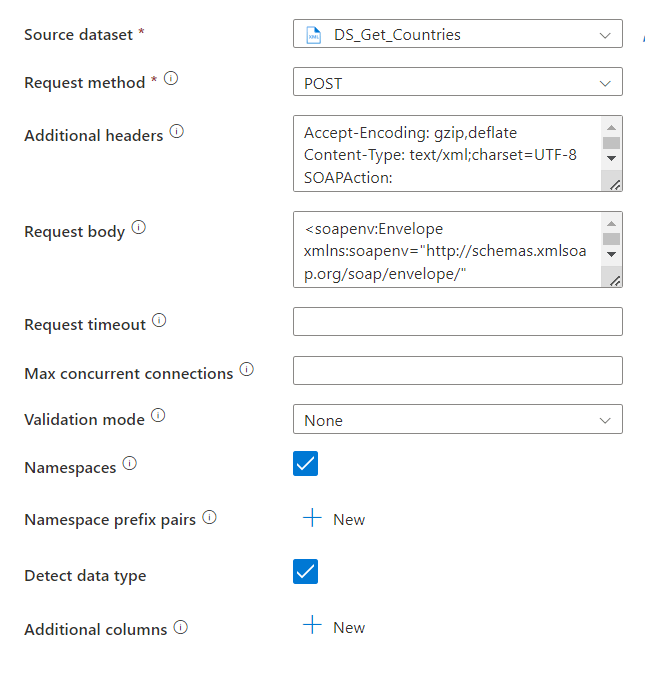
There’s a lot to see here. The source dataset is what we’ve created earlier. The request method of POST is the way these API’s work. You post a request and then get the result. My instinct is that I’m using a get but that doesn’t work.
These were the easy parts. Now the additional headers. To get these, my advice is to use SoapUI because this tool will hand the headers to you.
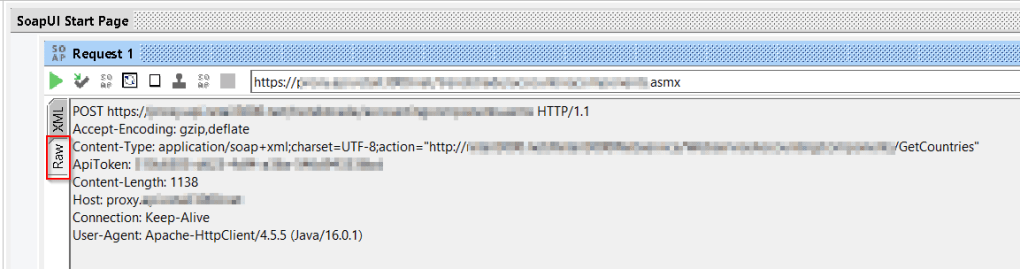
You can find the headers in Raw part of your request. It will give you the encoding, content type, any additional headers you need to connect to the API and the host proxy. All you need to do is copy this into the headers section of the source. And then some small editing. I’ve found that the copy data flow really wants an action header. So it should look something like this in the end:

The request body is identical to the one you’ve used in SoapUI, this is just copy-paste. It will contain any authorization stuff if needed in the body and all the special requests that are needed.
Now, if you’ve filled in all the details and need to check the data that is returned, remember that it will try and get all the data from the API. This can take quite some time, leading to a time-out in your browser. Besides that, I’ve had my browser tab crash multiple times on because I failed to learn that the API returned more data than the tab could hold. So if you really must check, do this after you’ve saved your work. Yes, I’m looking at me now. For the umpteenth time…
Sink
As you remember, my sink had a parameter for the file that’s going to be written inside the data lake. Now is the time to populate this field.

Nothing too special as you can see, apart from the filename. Go to the dynamic editor to see the full ‘code’
@concat('\Countries\',utcnow('yyyy'),'\',utcnow('MM'),'\',utcnow('dd'))
This code makes sure my data lands in de Countries folder and then a series of subfolders containing year, month and day. I’m loading once per day so this level of granularity should suffice.
Mapping
The schema of the incoming data is where some of the fun begins. Because here you need a working connection to your source. The schema import fires off your POST request and reads the first row. Based on that it will build the data schema and show it in the editor.
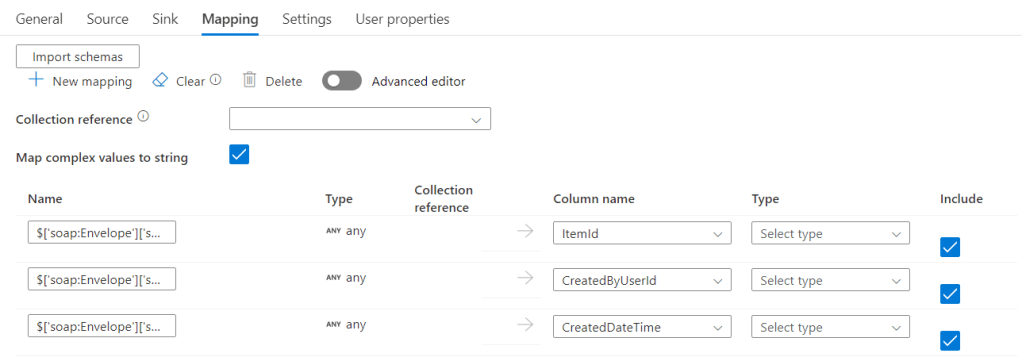
This may look familiar. the first thing you’ll see after you’ve clicked on the Import schemas button. It will get data from the API, translate it to JSON in the background and show you what it has made of it. Now there’s some work to do because this process is unable to determine the data types. It can try and infer them from the first row but that’s a quick way to collect failed debug runs. In the type drop down, you can select the data type.
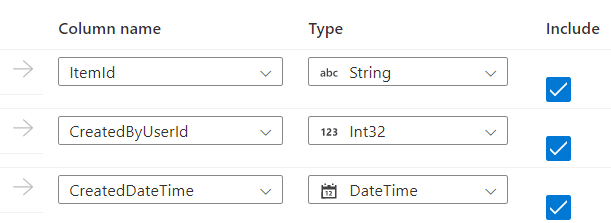
This wasn’t hard to do, though tedious if you have a long list of columns coming back at you from the API.
But there’s more. There a Collection reference in this window. When you click this, you might see something looking like this.
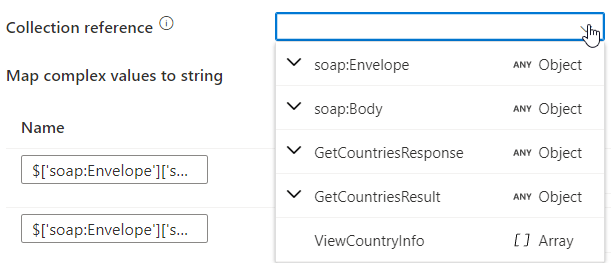
There are a lot of options to choose from, but this case, I need the ViewCountryInfo. This choice should help the data factory engine decide where the data lives and what is the fluff around it.
At this point, it helps to enable the advanced editor. This will show you some extra features to get the data from the schema.

Make a mental note of the Collection reference, compare it with the first column

You can see, they start the same way, but in the Advanced editor, there’s a drop down. Let’s see what this one can do.

So now, I can navigate through the XML structure and just select the data I need. And, I now get a better hint at data types.

Now, you’re ready to run this pipeline. This should run just fine and the data should be available in your data lake. From there on, you can work with it. But, things can still go wrong, let’s talk about some issues you can run into.
Issues
So far, all seemed to go well. This is true, but there are some catches.
The first issue I ran into had to do with the schema. Because when I ran this pipeline, this was the result:

Just one row. Where I’m expecting many more. It took some time and googling but then I found it. In the pipeline editor you can see the two curly brackets at the right hand top corner
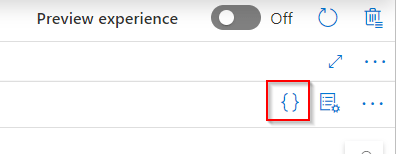
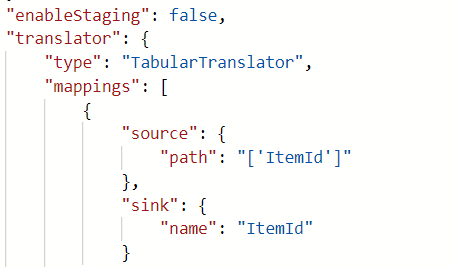
Click these and you’ll see the Json code that’s behind the interface. It’s nicely readable and when you scroll down to the mapping, you will see something like this.

This [0] means that ADF will only read the first row. I have no idea why they’ve done this. But remove the [0] and try again. In my case, I had to remove much more of this code:
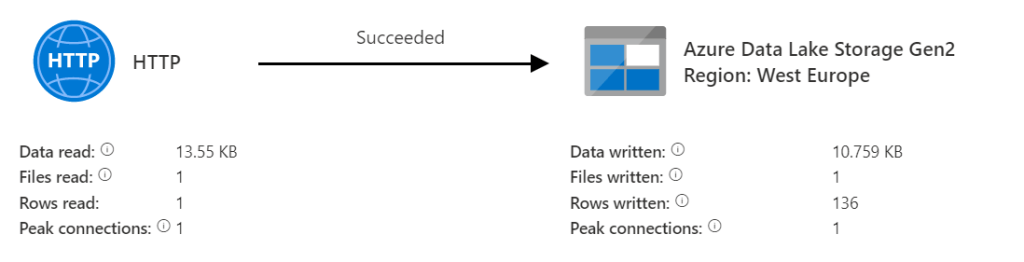
This can and most probably will be API specific, so it’s a bit of trial and error. But this is the result I was after:
But, this is only if the schema from the source system is correctly read and translated into JSON. If ADF is unable to do that, you’ll get no error message, you’ll get a row of data but it’s all empty.
You’ll see something like this

The collection reference won’t fill, the drop-down is empty. Somewhere the XML to Json translation went wrong I think. And at that point, I got stuck.
Solution
At this point, I had been working for over 16 hours to get the data from the API into a data lake with parquet files. Because the vendor already mentioned a change from SOAP to REST, I decided to park my ADF code and use PowerShell. I can create loops, delta scripts and outputs without too much effort and with that make sure the data lands inside my data lake.
Here’s my way to read data from the API and write it into the data lake, without storing it locally first.
$filename = 'Countries.xml'
$headers = @{ headers needed for your api
}
$body = @{ body needed for your api
}
$logonOutput = Invoke-WebRequest -Uri 'xyz.asmx' -Headers ($headers) -Method Post -Body $logonBody -UseBasicParsing

[Xml]$logonXml = $logonOutput.Content

$context = New-AzureStorageContext -StorageAccountName "sadatalake" -StorageAccountKey "A=="

$container = Get-AzureStorageContainer -Name "datalake" -Context $context

$dlFilename = 'folder\filename' + (Get-Date -Format "yyyy") + '\' + (Get-Date -Format "MM") + '\' + (Get-Date -Format "dd") + '\XML\' + $FileName

$content = [system.Text.Encoding]::UTF8.GetBytes($logonXml.Envelope.OuterXml)

$container.CloudBlobContainer.GetBlockBlobReference($dlFilename).UploadFromByteArray($content,0,$content.Length)
this code reads from the API, collects the data locally (in memory I think) and then writes it as a byte stream to the data lake. What you need to remember is that every column is ‘converted’ into a string or varchar. Remember that when you read the data into Synapse for example.
One tip there, when you write your XML data to file, check out both the Envelope.InnerXML and Envelope.OuterXML options to see what you need. In my case, the outer XML proved to be the one needed for the API that didn’t work. Maybe the backend of ADF is only reading the inner XML but that’s just guessing.
Finally
Extracting data from a Soap Api with Azure Data Factory is certainly possible. You need to know the WSDL, the vendors limitations and you need SoapUI to test your calls. It’s essential to validate your schema in ADF. The main bottleneck is how the ADF translates the XML schema into its own Json. If this goes wrong, things go south quick! But maybe the PowerShell solution will help you out.
Thanks for reading, I really hope this blog helps you out when you were stuck.

Thank you Reitsees. I think, if you have complexed XML/JSON object then Mapping data flow work very well and it will result all rows instead of 1st row. Mapping data flow has flatten transformation.
LikeLike
Thank you Alpa! I’ll try that out later and blog about my findings.
LikeLike