

Wait, what? Resiliency? Against what? Well. The cloud sounds like an amazing, magical place without limits. The truth is, it isn’t. Maybe you’ve seen the funny T-shirts with the text “the cloud is just someone else’s computer”. And that’s true. Instead of building and maintaining your own data centre, you’re hiring a global corporation to do that for you. And with that, you get a whole lot of options.
And that isn’t limited to services like storage, web portals, user management, and data stuff. It’s also location, backups, and disaster recovery. But there’s a catch: you need to make sure this is configured. I always compare the cloud (Azure in my daily work) with a huge box of Lego. You have all the pieces and elements to make something cool, but you have to build it. Even when you automate it, you still need to think about what you want.
Now, before I continue my Azure Fundamentals training, let’s move on to what this post is about: resiliency. Or, how your environment is set up for disaster recovery.
Let’s use the Azure Copilot to guide the process, create the necessary resource and review the advice.
Azure Copilot Agents: Resiliency Agent
Maybe you’ve seen the following option in Azure:
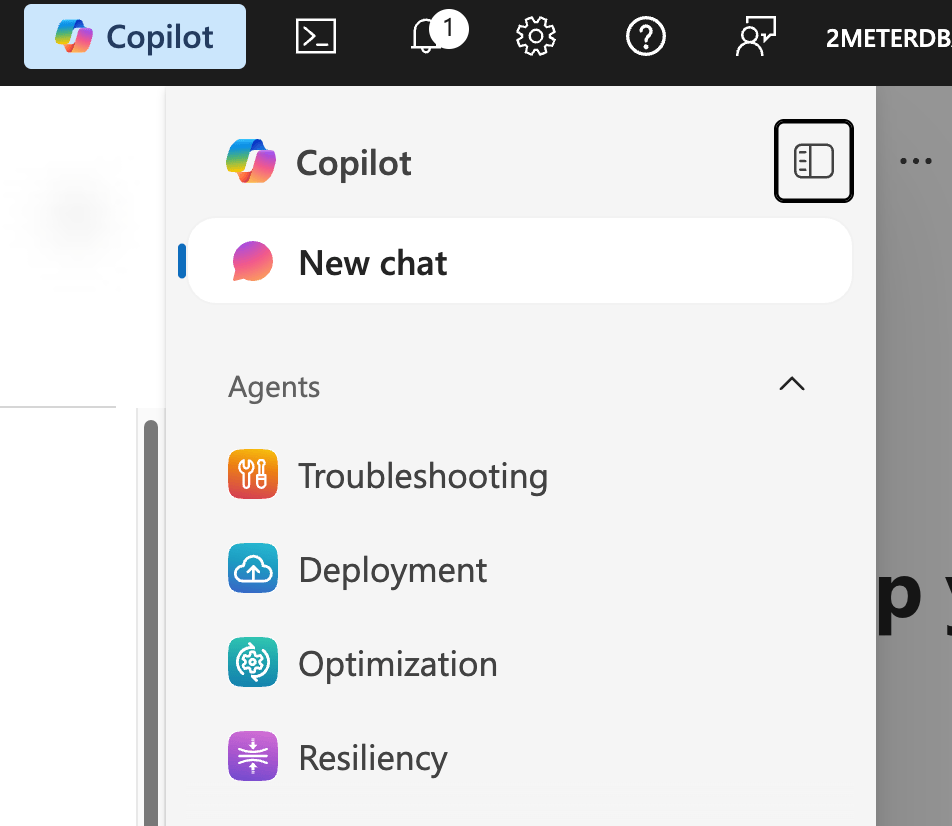
When you select Copilot, you can open the agent window. In this window, you can see a new option: Resiliency. There is an official page for this as well; click here to read the documentation.
When you hover over this item, three dots appear. Click them, and you’ll see an info button that shows this (as of September 2026).
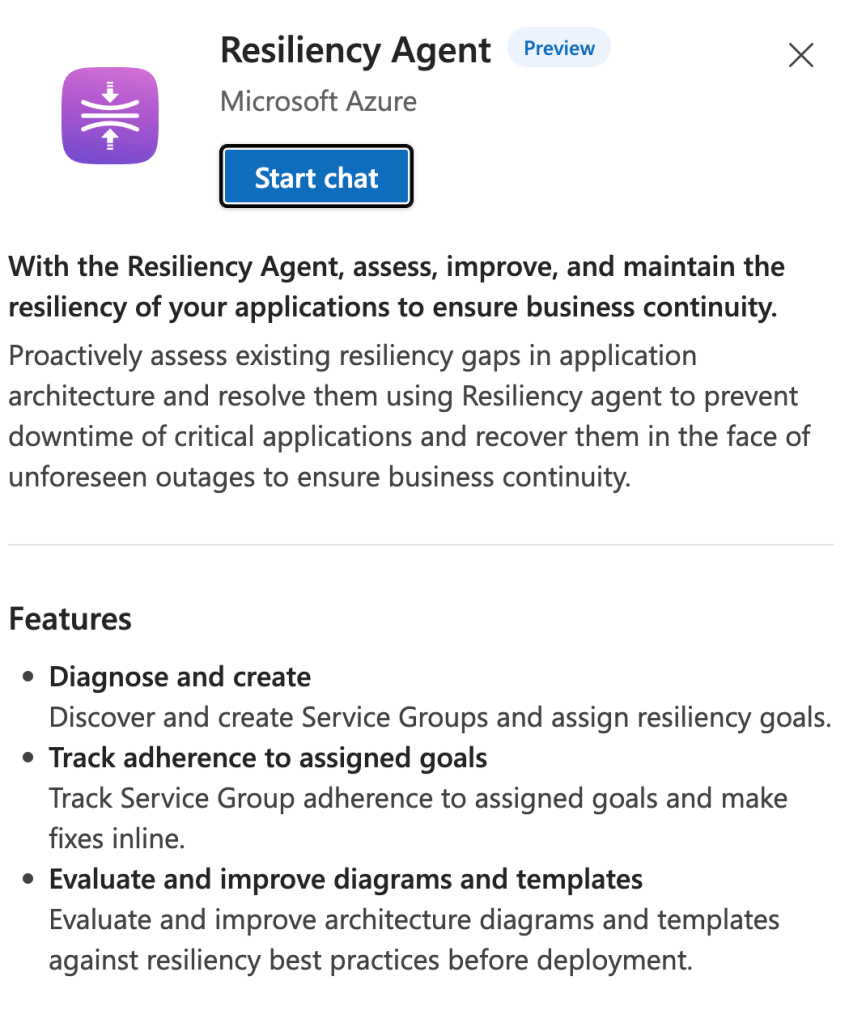
At first, this may seem a little intimidating. Luckily, some nice people behind this technology sat down with me and walked me through this. One thing to keep in mind: as long as it is in preview, you won’t be billed for usage. Once it is Generally Available (GA), there will be billing.
In essence, the first thing you need to do is create Service Groups. These groups are like Security Groups; they bundle related resources. Imagine you’re hosting a website with a database for storage and a Function App to connect the front end to it. Together with a virtual network and a firewall solution, they create the full application you need to, for instance, host an e-commerce website. I know that this is a simplified setup, but that’s not the point I’m trying to make. The point is that these Azure resources can be in multiple resource groups, depending on your main architecture. With a Service Group, you can now bundle these resources and apply the checks to them.
Now, what if you don’t have Service Groups? Well, let’s just use one of the default prompts you get when you open the Resiliency agent.
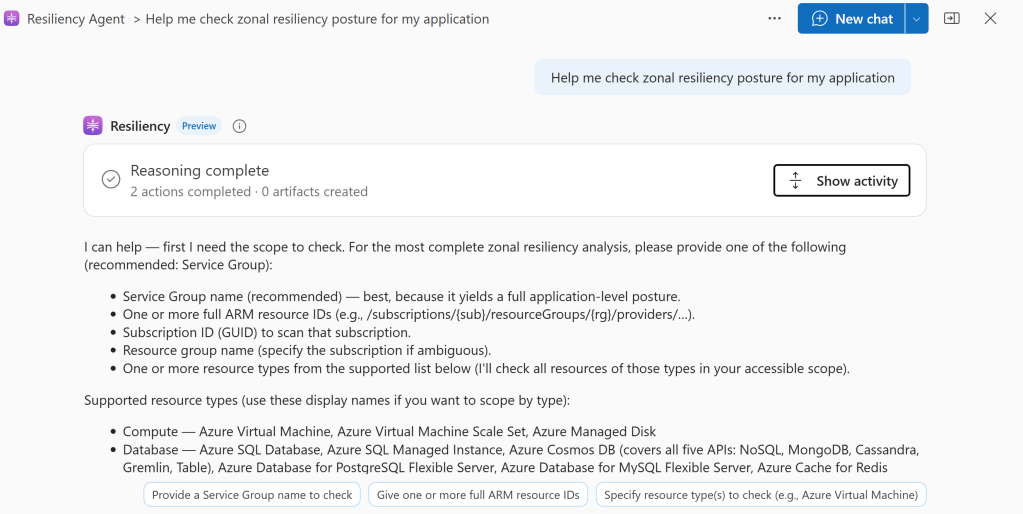
As you can see, and this will hopefully save you from burning tokens without much result, the agent asks for more information. You can also see the recommendation for a Service Group.
Creating a Service Group
Now, let’s follow the recommendation and create a Service Group. In my case, I’m going to add some data resources, since this is my daily business. This means VMs, Network, Azure SQL Databases, Azure Data Factory and Synapse Analytics.
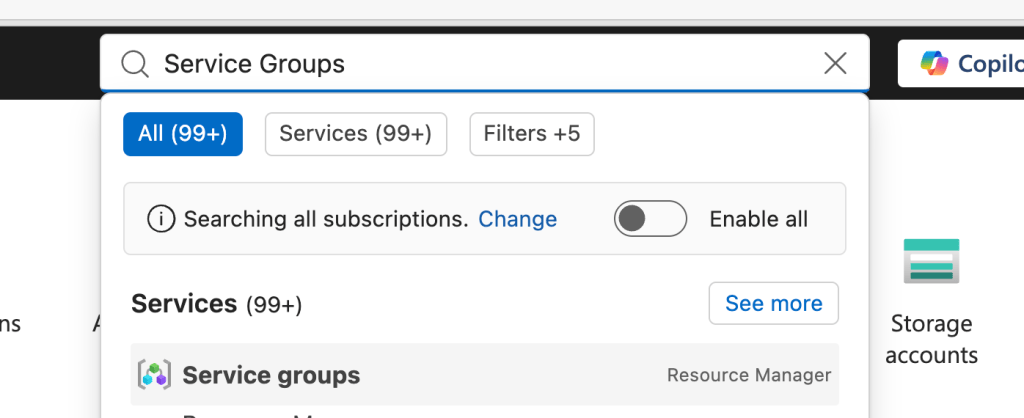
When you select the Service groups, you’ll either be routed to the ones you have, or you’re encouraged to create a new one if there are none. As my tenant has none, I’m going to create a service group.
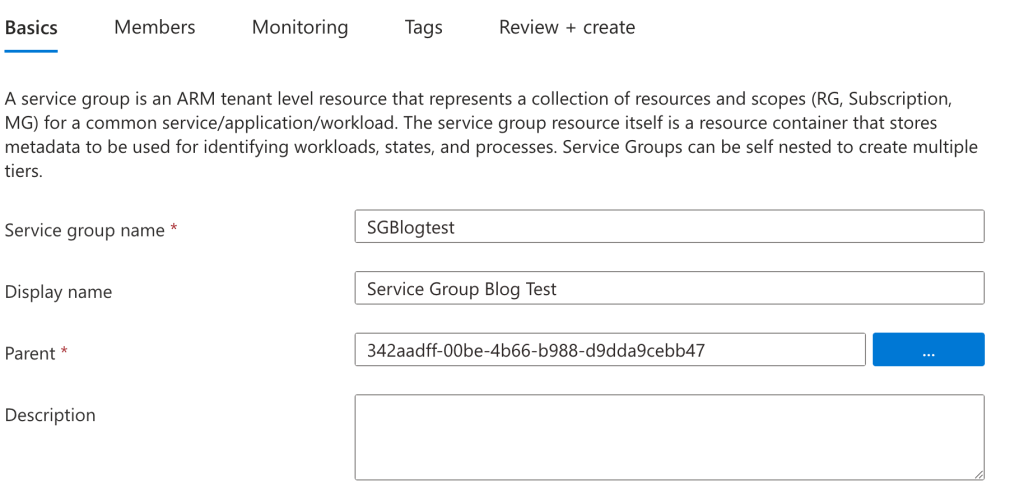
The first tab is always the easiest one. Give it a name, a display name and a description. Nothing really fancy here, to be honest. The parent is the Tenant root service group. If you’ve worked with Azure architectures, the term tenant root group may be familiar, as it is the starting point for management groups. They provide an extra level of organisation for Azure subscriptions, policy management and security. I like that Azure reused this way of working for service groups.
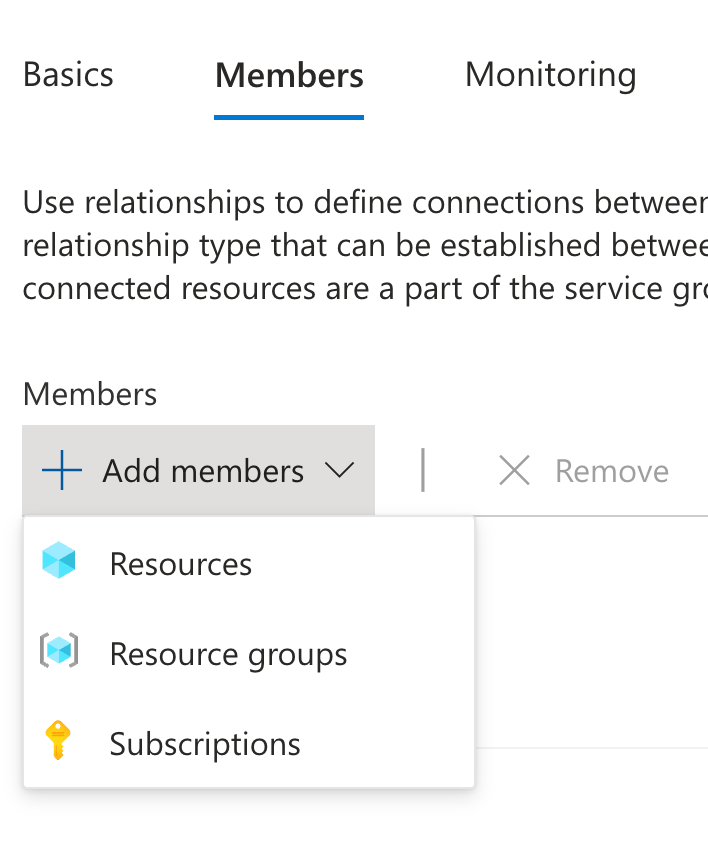
Now we get to the interesting part: adding the members. Or, what you actually do is add the different resources, resource groups or even subscriptions to what constitutes your solution or landing zone. Depending on your design, it will differ what you can or must select here.
The design in my tenant is mostly based on lifecycle, which means that resources that work together are put together in the same resource group.
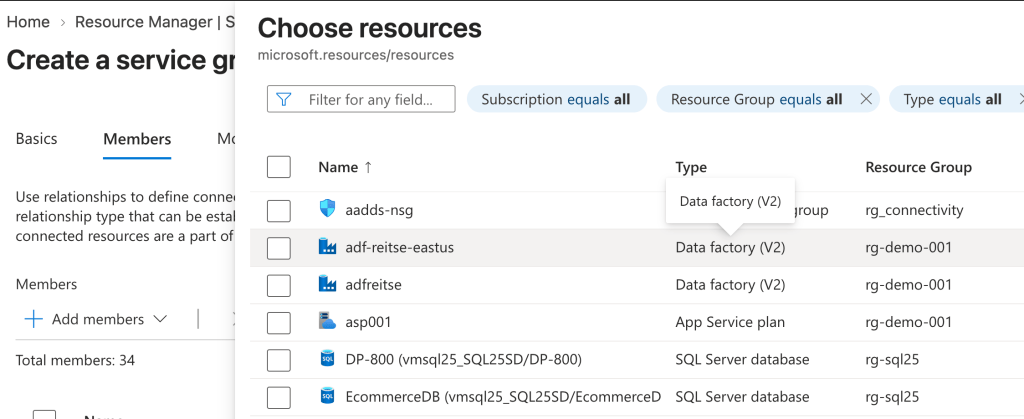
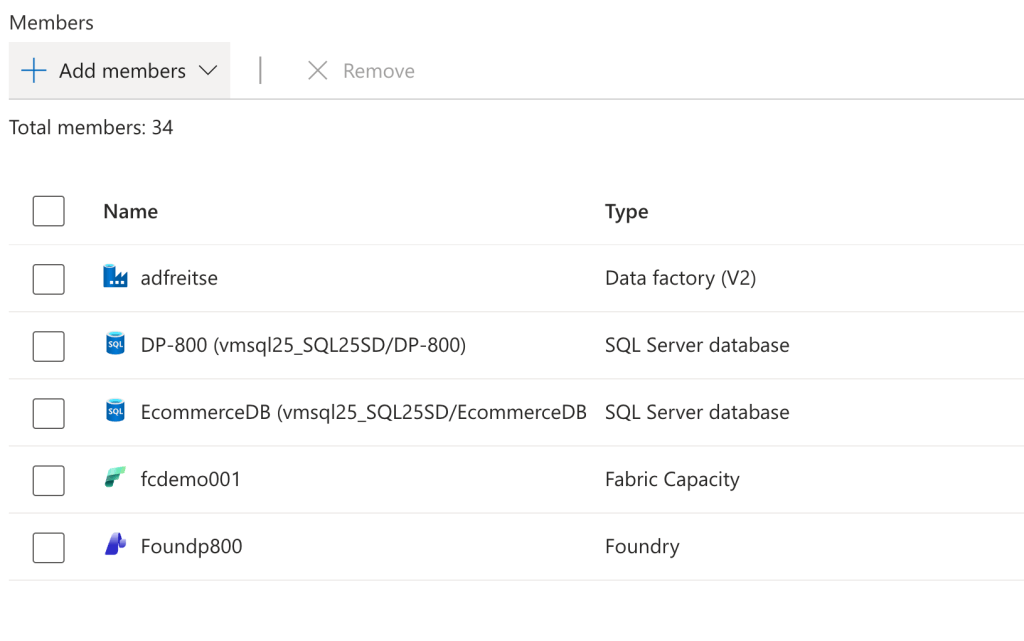
After selecting the resources, you’ll get an overview of all the selected Azure resources.
Next, you can choose to set up monitoring for your service group. For now, I’ve decided to skip this, as it adds extra workload to my subscription and, for the purposes of this blog post, isn’t really necessary.
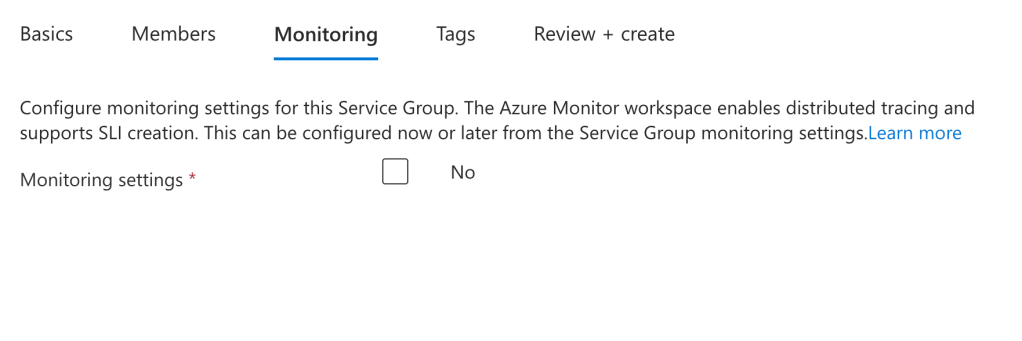
After that, you can add tags if you want, then review the settings and create your service group.
When this process completes, it can take a few minutes depending on the moon, weather, gravity, and the Force, you’ll see the following.
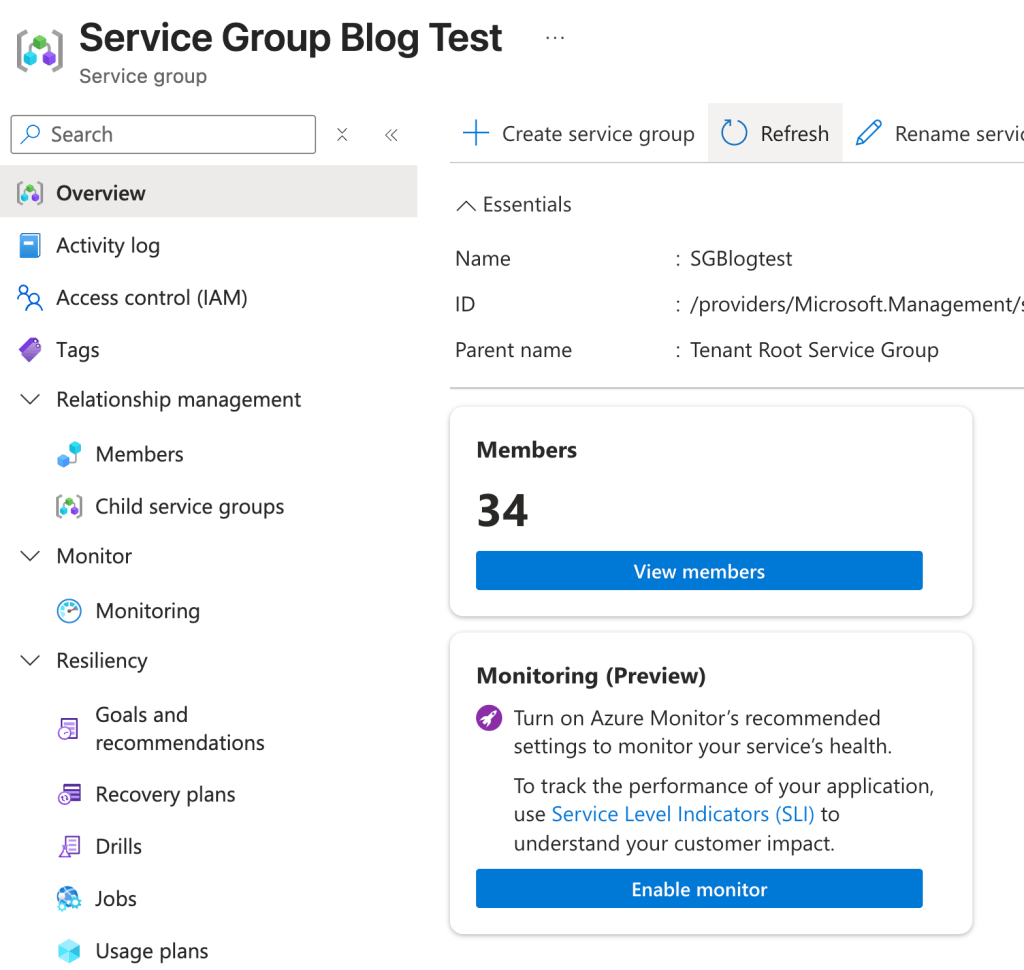
You can see the Resiliency here as well, but let’s start where we left off earlier; in the agent.
Create the Resiliency goals
The new request came back empty. I need to create some Resiliency goals for this agent to return a recommendation. This makes sense, as without a goal, it’s hard to work towards one.
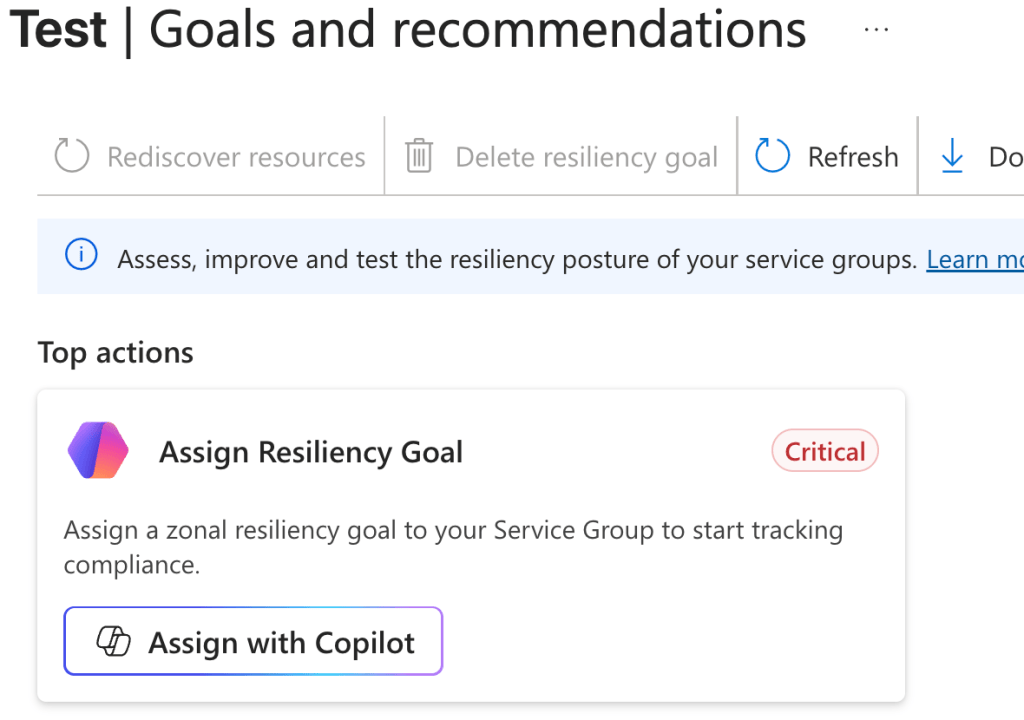
In my Service Group, I selected the Goals and recommendations options from the left menu. This now shows the Assign Resiliency goal option, which Copilot can help with. Let’s see what it comes up with!
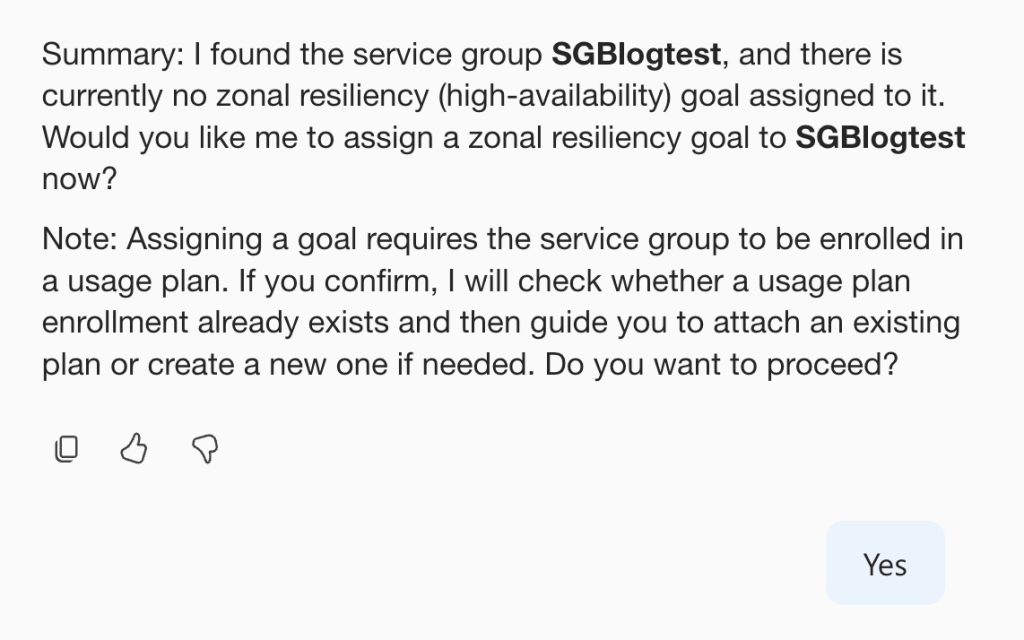
After clicking Yes, I have to wait for Copilot to do Copiloty stuff.
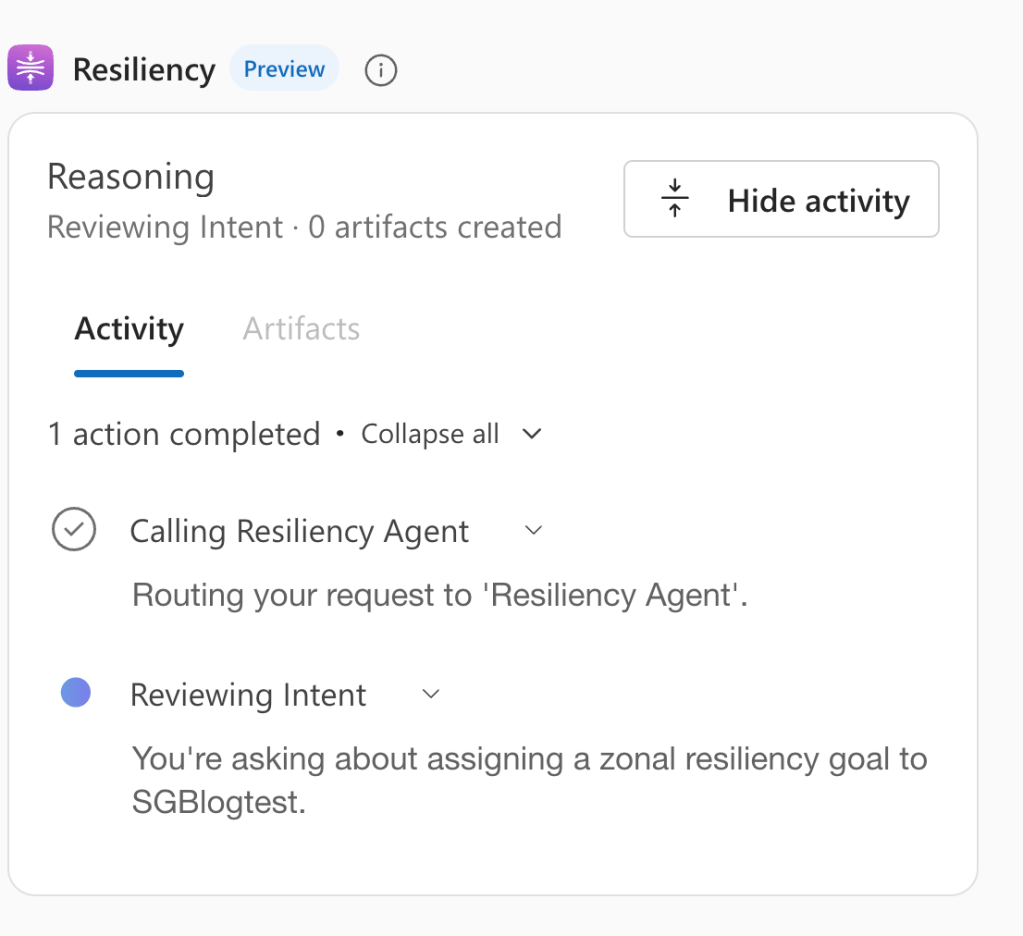
After something like two minutes (about the time I needed to write these lines, create the screenshot and paste it here, the process finished.
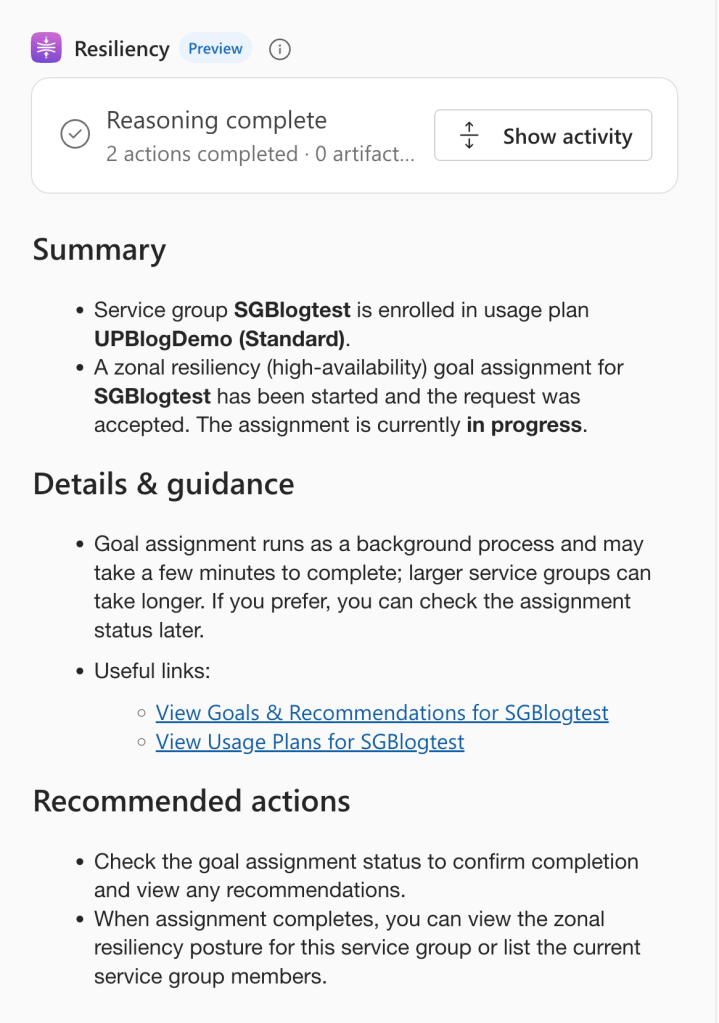
Before I started, I didn’t create a usage plan; Copilot created this for me. Of course, it enrolled me in the standard one. There’s also a basic option with fewer capabilities. Check the current documentation on which one you need for your use case.
I genuinely like the note that a background process is now running and can take some time. It manages my expectations on when I can check the result. As I’m a very impatient person, I hit refresh a lot; now I know I can get my coffee or tea first before I hit refresh.
Check the current resiliency
One prompt is to check the goal assignment status; another is posture. As every prompt will incur some kind of cost, I’m going to leave the first one and ask Copilot to check my zonal resilience.
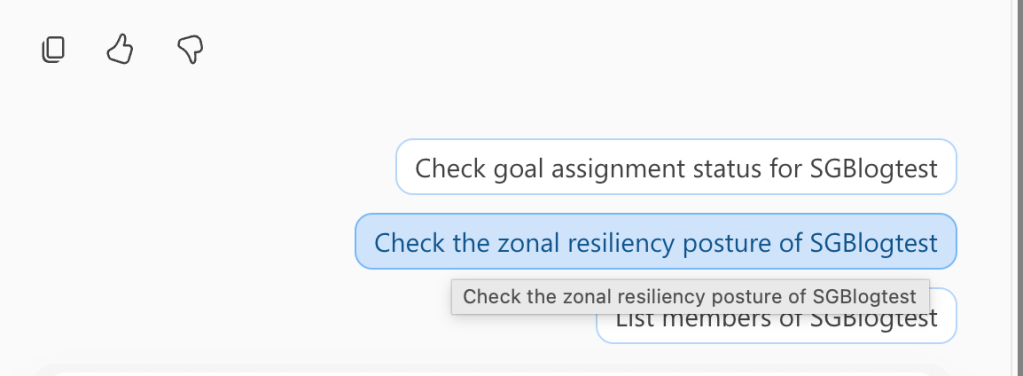
And with one click, Copilot sets off to work again.
Let’s see what it comes up with. As this is my demo environment, all my resources are set to locally redundancy. This means that if one data centre building fails, my resources will go offline.
This is the reply from the agent:
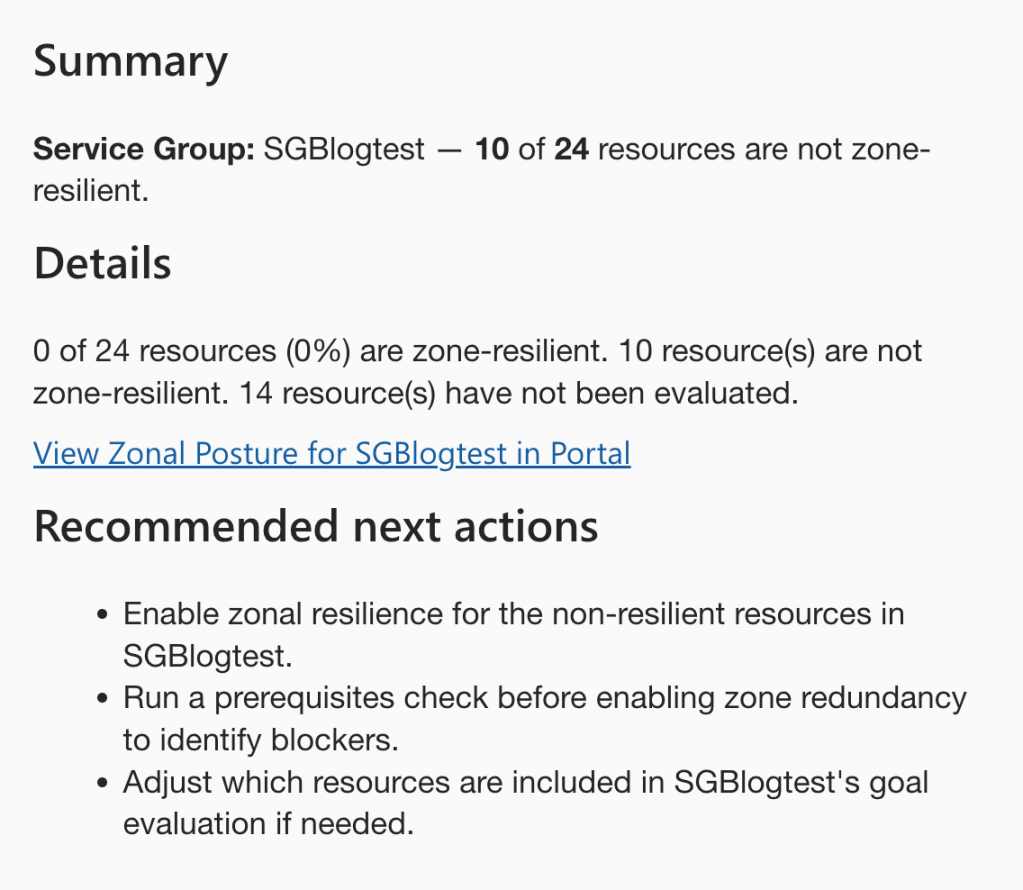
There are two things I want to focus on. First, there is a link to the Zonal posture in the portal. When you click that link, and I suggest you do that in a new tab or window, this comes up.
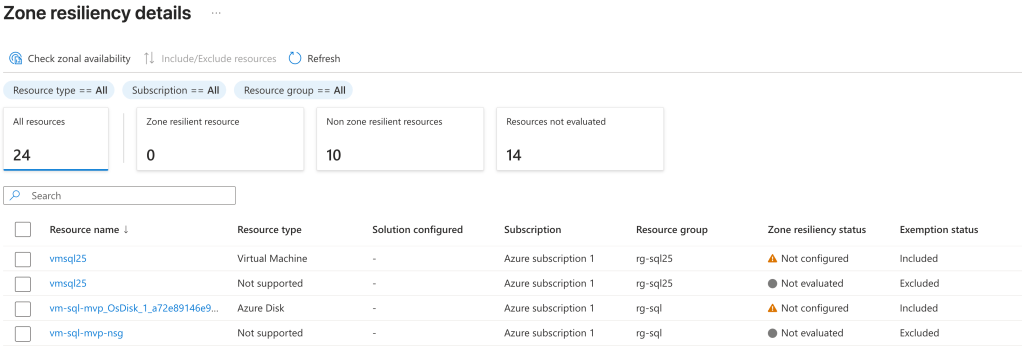
Some resources don’t support resiliency, like a Network Security Group (NSG), some are not configured (like my SQL Server 2025 VM).
Improving the resiliency
The other part I want to focus on is the options that Copilot offers.
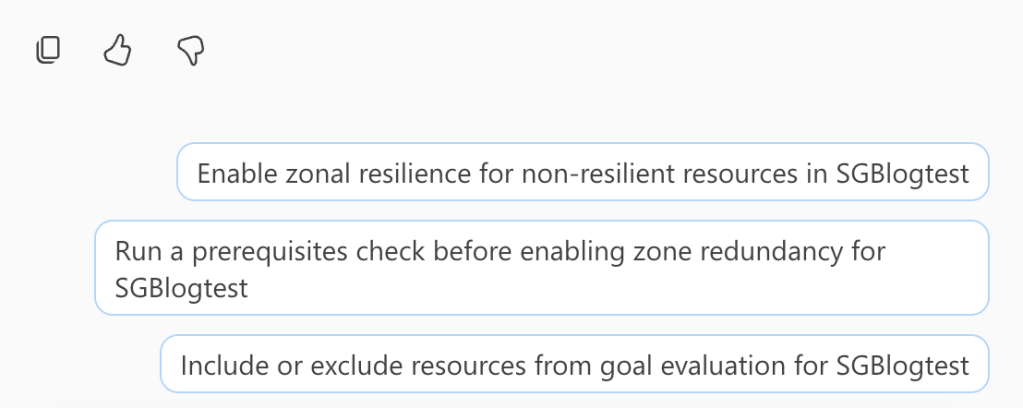
I would have changed the order of the prompts; start with a prerequisites check, then include or exclude resources and end with enabling zonal resilience. When you offer them in that order, it’s more like a to-do list you can work down.
Let’s see what happens if I do a prerequisites check.
This takes a minute or two, and I’ll show you a small part of the output.
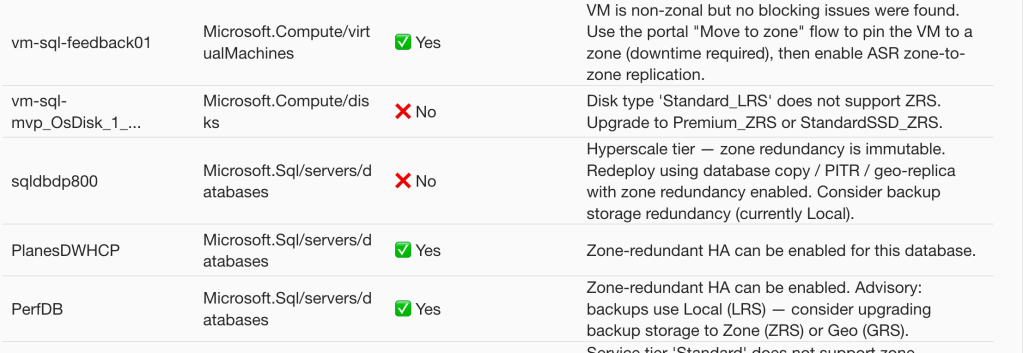
This output shows me where possible issues may lie, and how to handle them.
Copilot then offers three option to move forward.
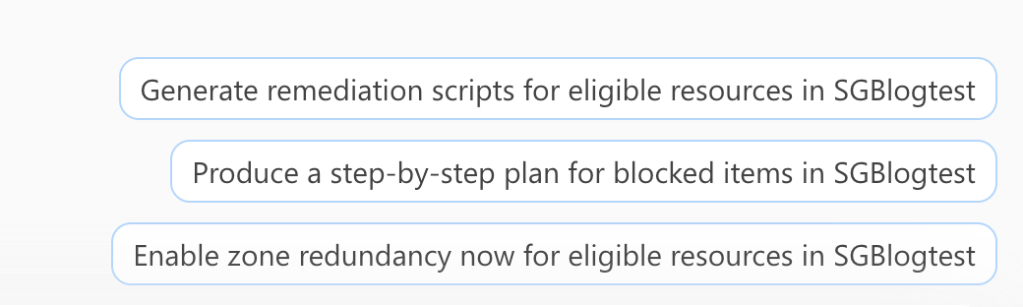
You can let Copilot create scripts, produce a plan or let it do all the work for you. I like to be in control, so I’m not going to let Copilot go wild in my tenant. In most cases, I’d opt for the remediation scripts, as I think it’s best practice to deploy your Azure resources with Infrastructure as Code (IaC).
Create code files
When you ask it to generate the scripts, it toddles off to see what it can do, and asks which format you want the result in: PowerShell, Azure CLI or ARM/Bicep. I’m hoping Terraform will be included soon, as that’s my personal preference (I won’t be taking questions on that), but I can live with Bicep.
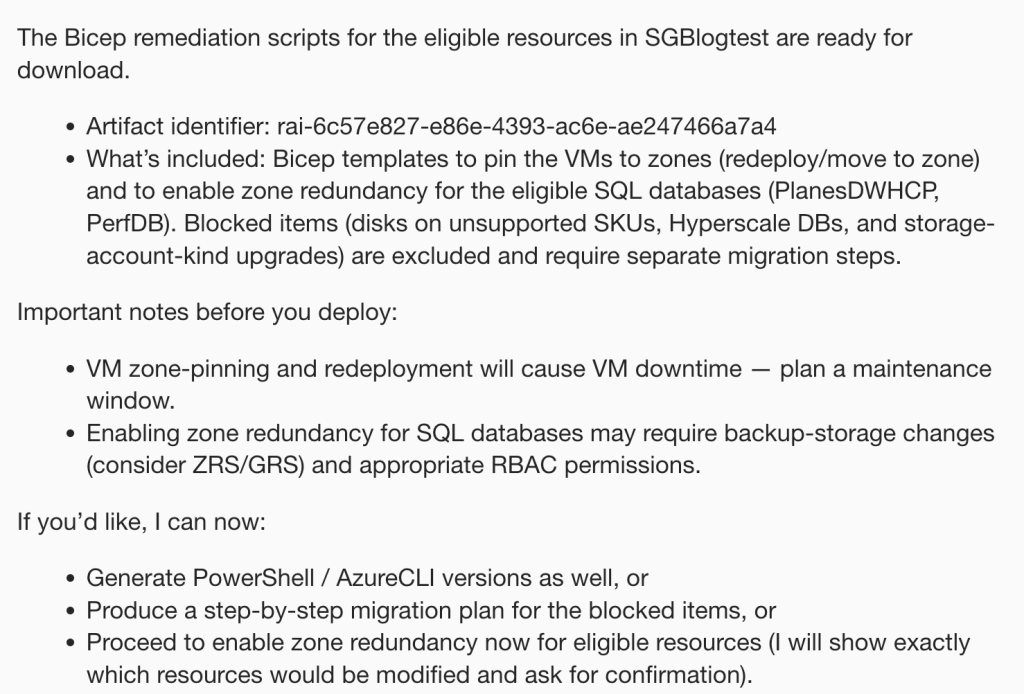
The process creates my files and offers them for download. This is where some optimisation can be found; it could have done all this in one go. I want the scripts in Bicep and prepared for download.
When the last step to generate the code is completed, this shows up.
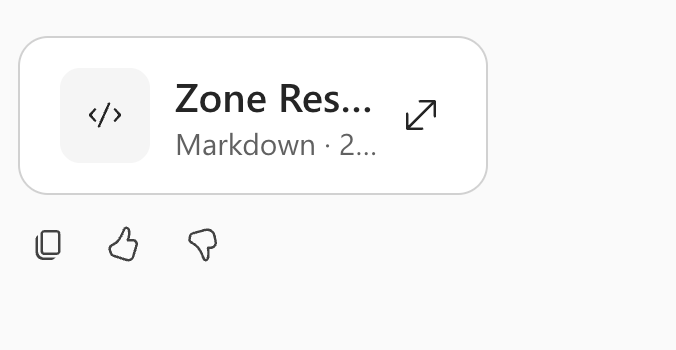
In the output, you should be able to find a file that is, somewhat incorrectly, shown as a Markdown file.
Let’s show a snippet of this code.
/ Enable zone redundancy on Azure SQL Database(s)
// Reference: https://learn.microsoft.com/azure/templates/microsoft.sql/servers/databases

resource sqlDb_PlanesDWHCP 'Microsoft.Sql/servers/databases@2023-08-01' = {
  name: 'sql-planes-preview/PlanesDWHCP'
  location: 'eastus'
  properties: {
    zoneRedundant: true
  }
}

resource sqlDb_PerfDB 'Microsoft.Sql/servers/databases@2023-08-01' = {
  name: 'sqlmvplearn/PerfDB'
  location: 'eastus'
  properties: {
    zoneRedundant: true
  }
}
These commands change the zone redundancy to true. There is a lot of code for the other resources too, I just wanted to focus on the Azure SQL DB changes.
When you open the code, you can also create a pull request, which immediately adds the suggested code to your repository.

Drill
The last option I wanted to highlight in this long blogpost is the Drills feature. In essence, this will simulate an outage and report how your resources will react to it. There is an extensive description of how to work with this if you follow this link.
Final words
First, this feature is in preview, and it’s free. I would recommend that you take advantage of this and scan your Azure environment for resiliency. Make sure to create the advice and see where improvements lie. You can also read this as ‘here be dragons’.
If you move on to fully put this option to work, make sure you use the drill function. Just like it’s best practice to restore a database backup, test your failover functionality. Yes, there will be downtime, so plan accordingly. But by repeating the process, you’ll know what to do when an actual disastrous event happens, and you won’t have to figure it out when pressure is high.

